using ssh to run commands remotely

Deployment systems like Chef are great, but sometimes it’s useful to have an ad-hoc method for running commands on remote systems. ssh is great for this, in part because it’s already present on most systems.

To follow these examples it’s best to have passwordless authentication setup, otherwise you’ll end up having to enter your password lots of times (you are read about this here).

Running a command on a single remote system is trivial with ssh. You can just do the following:

ssh myusername@remotecomputer mycommand

For example, if you were trying to download an install a tar ball:

ssh [email protected] wget http://exegensis.com/package.tar.gz
ssh [email protected] tar xzvf package.tar.gz
ssh [email protected] tar xzvf ./package/install.sh

Which would run three commands on the remote host to download the package, untar it and run an install script.

However with a bit of bash magic you can use ssh to run the same command on multiple systems (here valis tyrellcorp polsvr1). For example:

for i in valis tyrellcorp polsvr1; do
  ssh pkdick@$i wget http://exegensis.com/package.tar.gz;
  ssh pkdick@$i tar xzvf package.tar.gz
  ssh pkdick@$i tar xzvf ./package/install.sh
done

Which would run the same install process as above on servers called valis tyrellcorp and polsvr1.

It’s a hacky solution compared to using a real deployment system, but it can be useful at times. Particularly for quick fixes.

Simple Chef Example

Chef is a tool for the automated deployment of servers, workstations and services. The idea is pretty neat in that once you’ve built your scripts you can tell Chef “I want a new Redhat server running apache, it needs to have Ruby etc. and my web app installed” and Chef will go away and figure everything out and do it.

I’m just learning to use Chef and I wanted to put together a simple example. Getting Chef installed on Ubuntu 10.04 was harder than I expected! The install process here has a LOT of redundant steps. At some point I’ll try this again on a clean server and correct this.

So here’s the process to run an example simple Chef “recipe”. It uses chef-solo, which is a serverless version of Chef.

1. Install Chef. On Ubuntu I did the following. I had some issues during install, and some of the following packages may not be required, but this is exactly what I did:

sudo apt-get install chef ruby-dev build-essential ruby-gems1.9.1 libxml2-dev libxslt1-dev ruby1.9.1-dev
sudo apt-get install libopenssl-ruby1.9.1
sudo apt-get install ruby-gems
sudo apt-get install libmixlib-log-ruby
sudo gem install net-shh net-ssh-multi fog highline # THIS PROBABLY ISN'T REQUIRED
sudo gem install chef                               # THIS PROBABLY ISN'T REQUIRED
sudo gem install knife-ec2
sudo gem install mixlib-authentication
sudo apt-get install libhighline-ruby1.9.1
sudo apt-get install ruby-full
sudo gem install json
sudo gem install highline

2. Create a chef-solo config file and place it in ~/solo.rb (note, you must use the full path to your home directory here):

file_cache_path "/home/YOURUSERNAME/chef-solo"
cookbook_path "/home/YOURUSERNAME/chef-solo/cookbooks"

This just tells Chef where to store cached files and where your “cookbook” lives.

You need to create these directories for Chef:

mkdir chef-solo
mkdir chef-solo/cookbooks

3. Use knife to create a new “cookbook” a “cookbook” is where your “recipes” (install scripts) go. For some reason, knife isn’t anywhere on the path…

/var/lib/gems/1.9.1/gems/chef-0.10.4/bin/knife cookbook create MYCOOKBOOK -c ~/solo.rb

4. Create you recipe file, create a new file called:

~/chef-solo/cookbooks/MYCOOKBOOK/recipes/myrecipe.rb

With the following contents, edit YOURUSERNAME and YOURUSERGROUP accordingly:

if platform?("redhat", "centos", "fedora")
  # code for only redhat based systems.
  file "/tmp/rpm_based" do
    owner "YOURUSERNAME"
    group "YOURUSERGROUP"
    mode "0755"
    action :create
  end
end

if platform?("ubuntu", "debian")
  # code for debian based systems
  file "/tmp/deb_based" do
    owner "YOURUSERNAME"
    group "YOURUSERGROUP"
    mode "0755"
    action :create
  end
end

5. Create a JSON run specification. Create a new file called ~/this.json with the following contents:

{
  "run_list": [
    "recipe[MYCOOKBOOK::myrecipe]"
  ]
}

6. Run the recipe!

chef-solo -c ~/solo.rb MYCOOKBOOK -j ./this.json

This very simple example recipe just checks if the server is running a debian based distribution or a redhat one and writes a file to /tmp accordingly.

Solwise 600ER

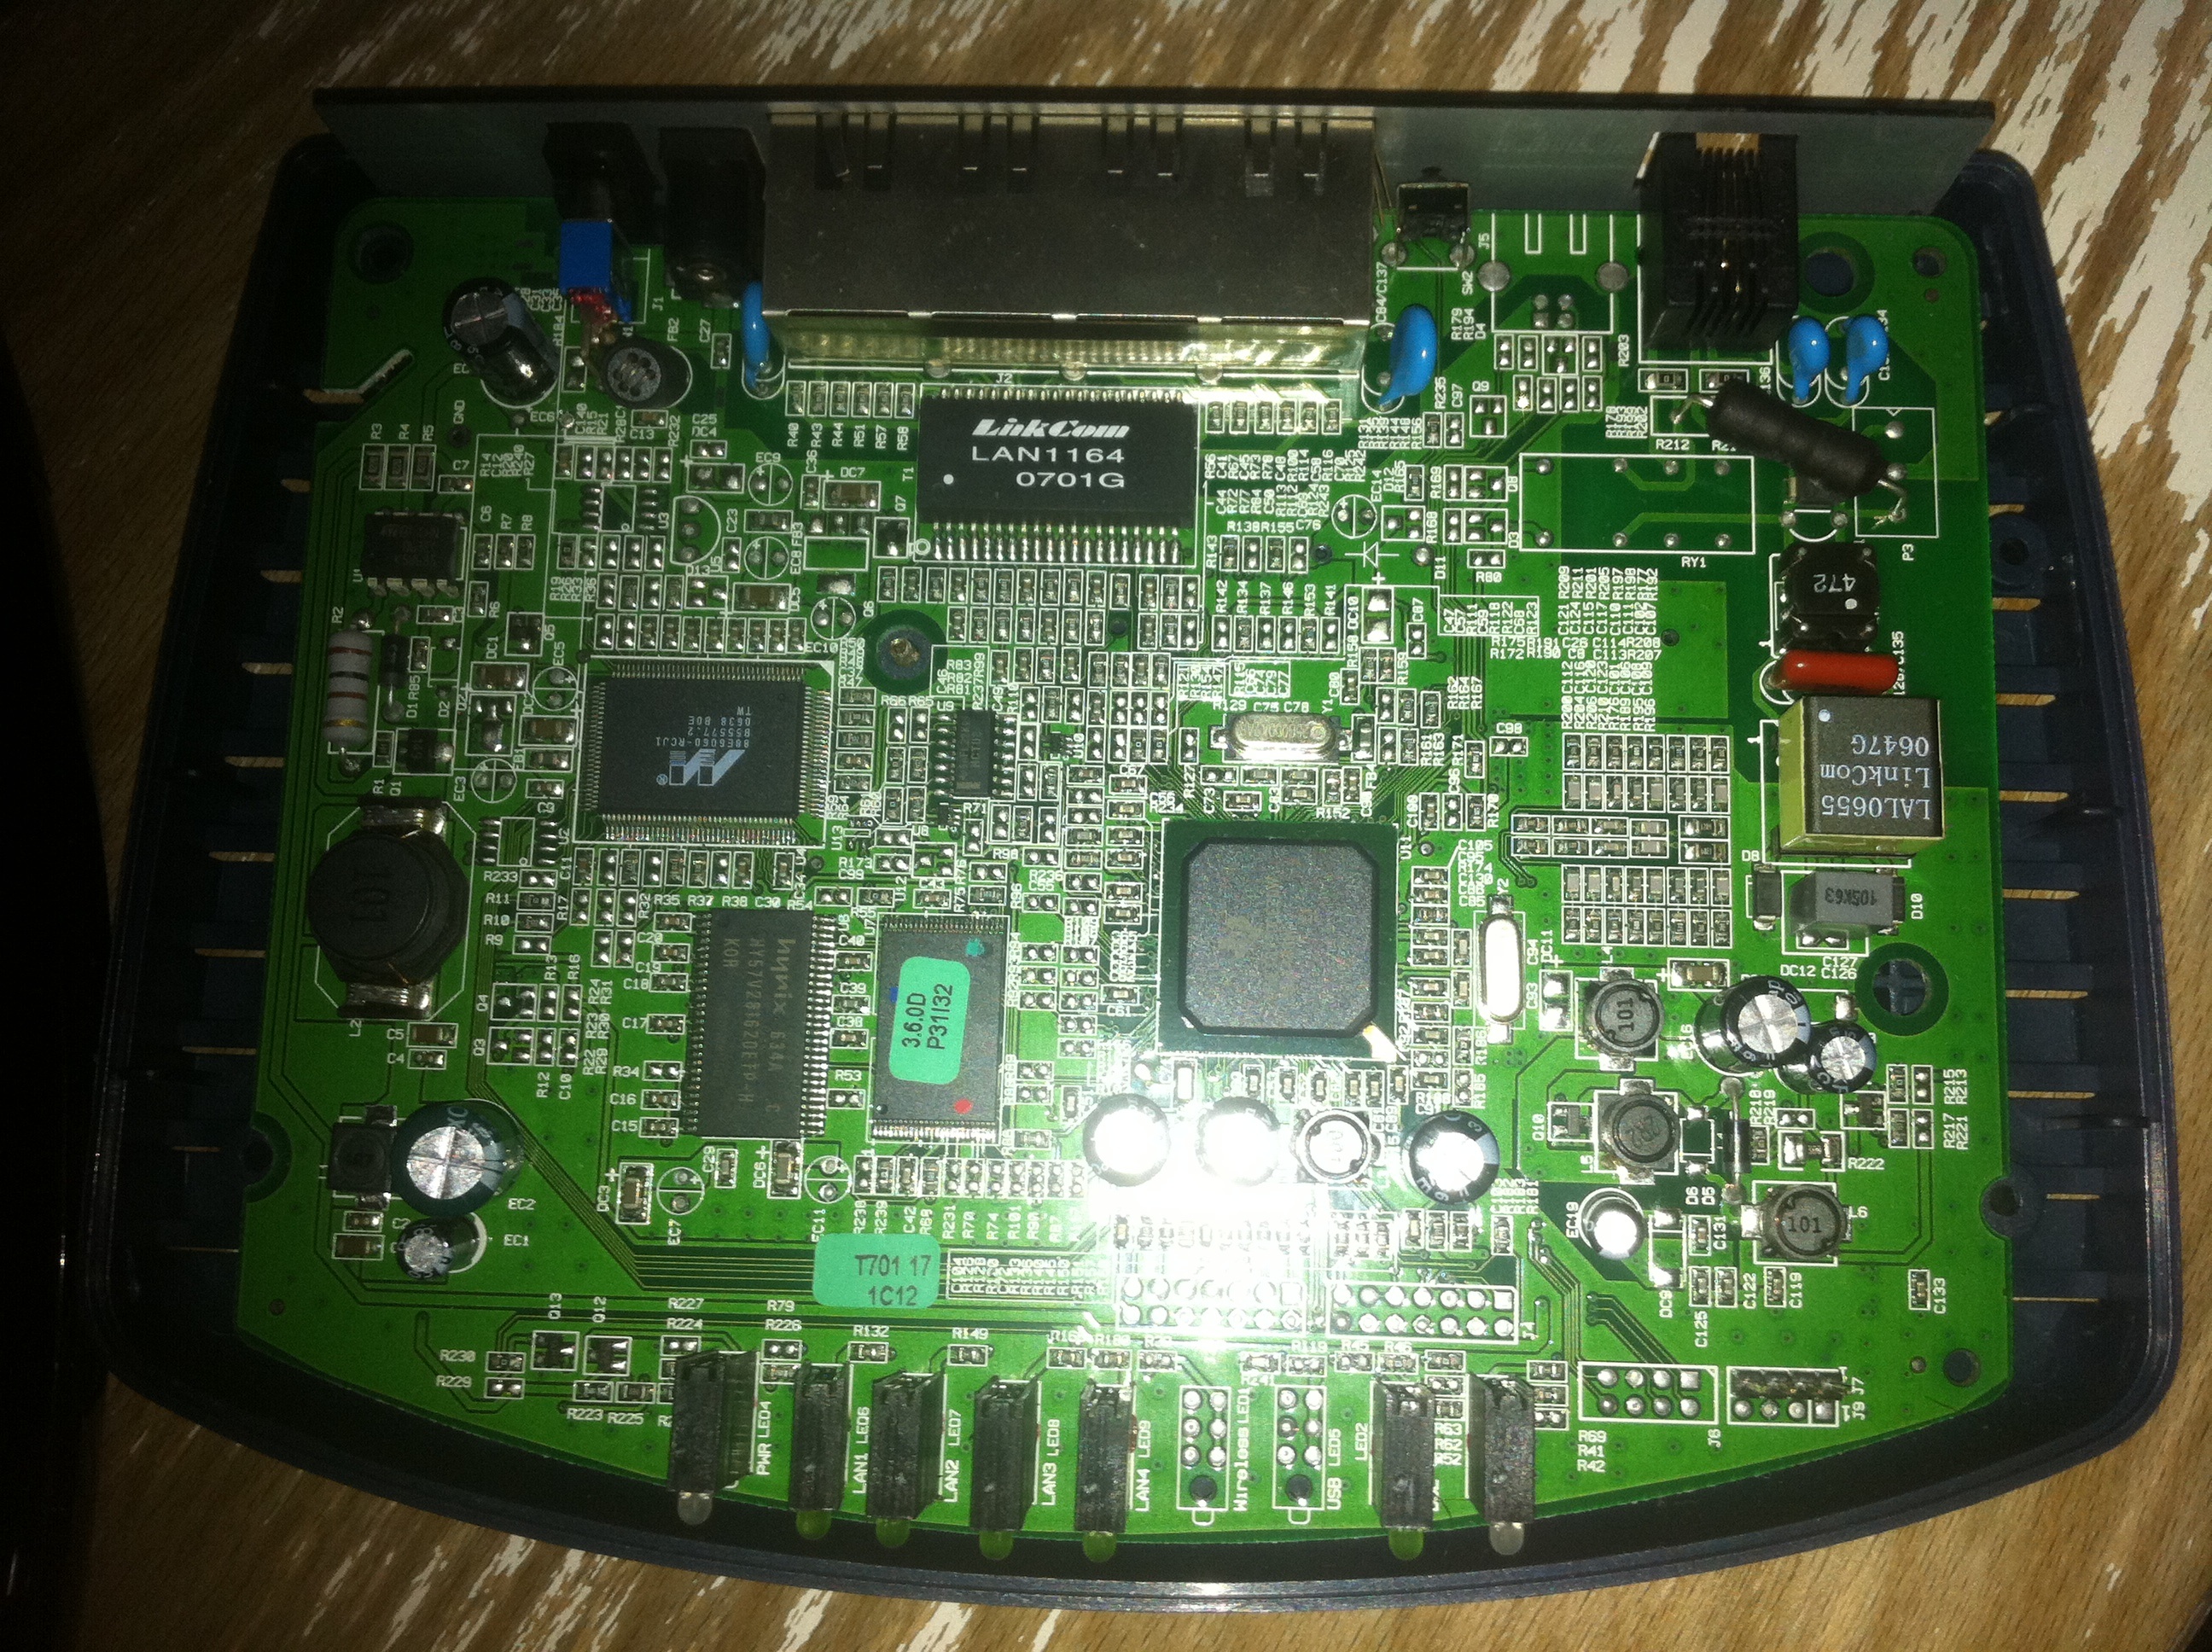
The Solwise 600ER is a fairly standard ADSL router. What makes it special is that by default it runs the open source RouterTech firmware making it a little more hackable than a standard ADSL router. It uses a TI AR7 processor (MIPS32). Here are a couple of PCB photos:

solwise600er pcb

The rear side of the PCB has unpopulated connections for a miniPCI card, most probably to add a Wifi card (and I’d guess it’s the same PCB as in the SAR-600EW).

I’d like to hack around with it a bit, and run an external facing webserver on it perhaps. It’s a shame it doesn’t have USB host.

A Programmable Keyboard Controller

I was frustrated by the Mac keyboard layout and also noticed that a lot of projects require some kind of custom keyboard controller (for example, if you’re trying to hack and old PS2 keyboard to work with a modern system. For this reason I decided to create a programmable keyboard controller.

The controller is based around a AT90USBKey and uses the LUFA library to manage the USB HID stuff.

To use the keyboard controller you need to removed the existing controller from your keyboard (hence the Mac keyboard disassembly I previously posted). Once removed you need to connect the keyboard matrix to the controller. It doesn’t really matter how you connect it, the idea is that the keyboard will learn the keyboard layout.

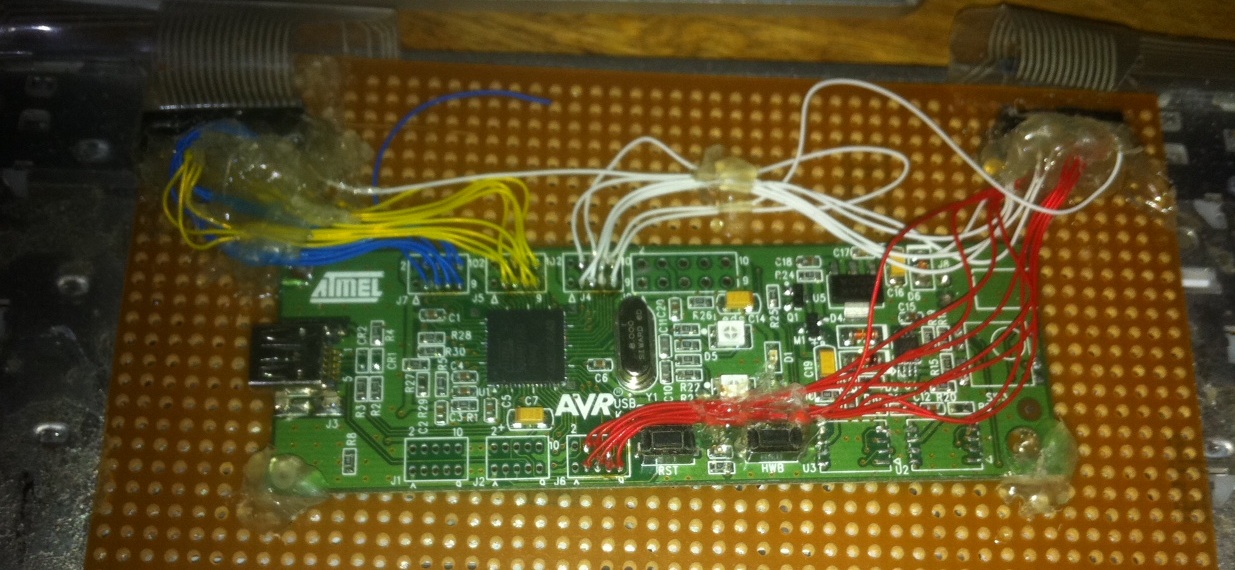
Here’s a close up of the controller installed in a Mac full size keyboard:

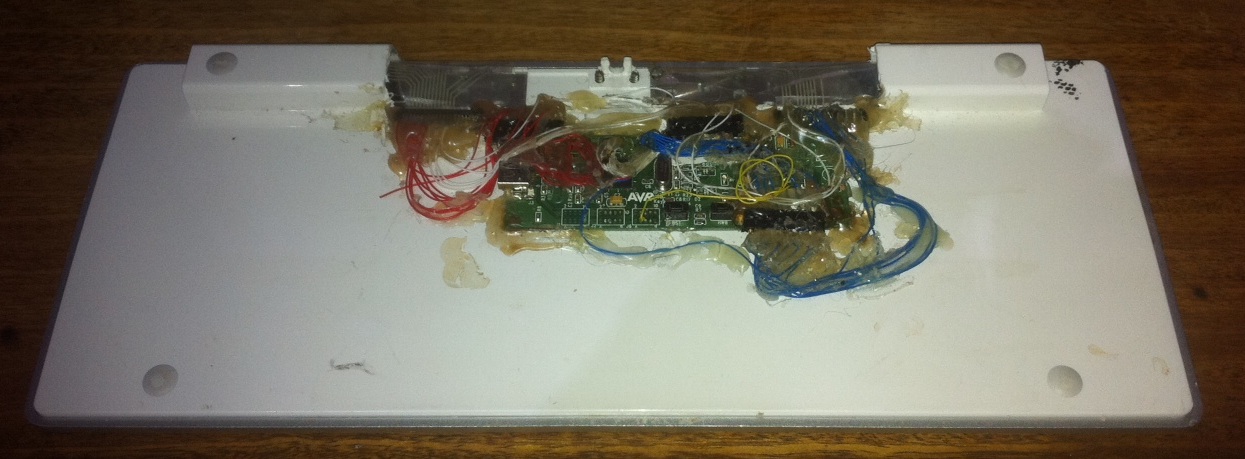
And a slightly less elegant hack in to a Mini mac keyboard:

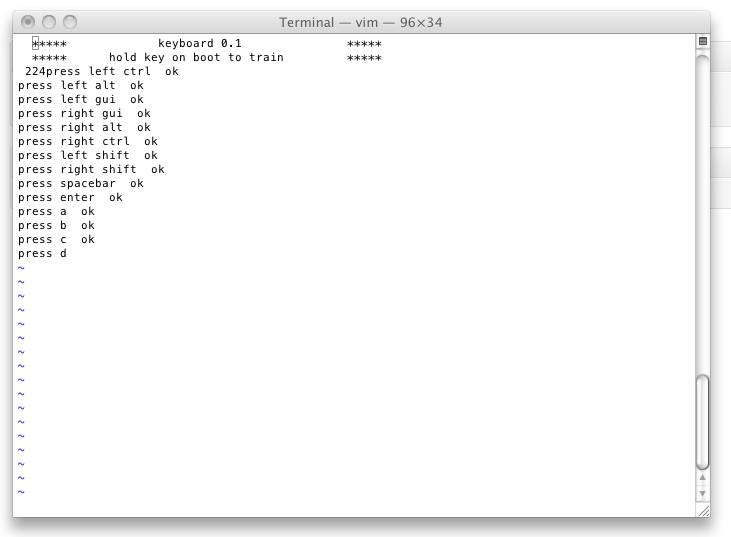
To program the keyboard, open notepad or another text editor on your computer. Plug the keyboard in while holding down a key. The keyboard will being typing text in to the text editor. It’ll start my printing a welcome message and will then ask you to press keys on your keyboard.

The controller is now learning which key is which. It’s continually scanning the keyboard matrix, and when it detects a short between pins it registers this as the key it’s currently learning. Once training is complete the controller writes the matrix layout information to the AT90s internal flash. So you only need to train once.

The whole thing seems to work pretty well, though I think my debouncing logic could do with some work. Suggestions are welcome.

I’ve put all the code on sourceforge here.

If you’re interested in using or developing from this code, please let me know. I think a keyboard controller like this could be a generally useful tool for hacking projects.