Arduino Uno – Getting Started

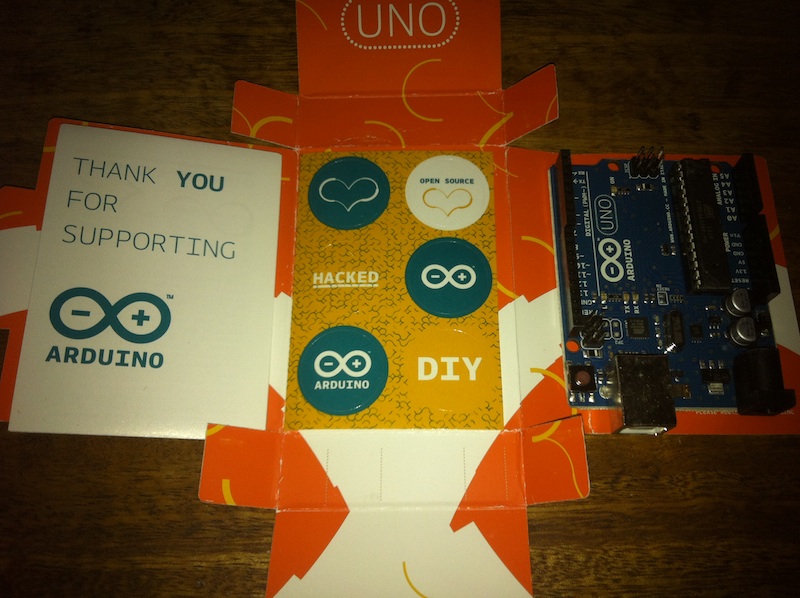
I received my Arduino Uno from Farnell today. One of the nice things about the Arduino is that for a piece of hobbiest electronics, it’s rather attractively packaged!

To do anything useful with the Arduino you’ll need an “A to B type USB cable”. You’ve almost certainly got one already, they commonly come with printers and I always seem to find them around my flat hiding behind furniture.

Download the Arduino environment here. The resulting zip file should be extracted automatically, copy “Arduino” to “Applications”.

Plug in your Arduino. You should see the following dialog pop up:

Click “Network Preferences”, when the config dialog pops up just click apply.

Load the Arduino software!

In the Arduino software select File->Examples->1.Basics->Blink

Select the correct serial port. Tools->Serial Port->Something. Where something should be /dev/tty.usbmodemXXX if there’s more than one, some trial and error maybe involved.

Click the upload button (highlighted in yellow below):
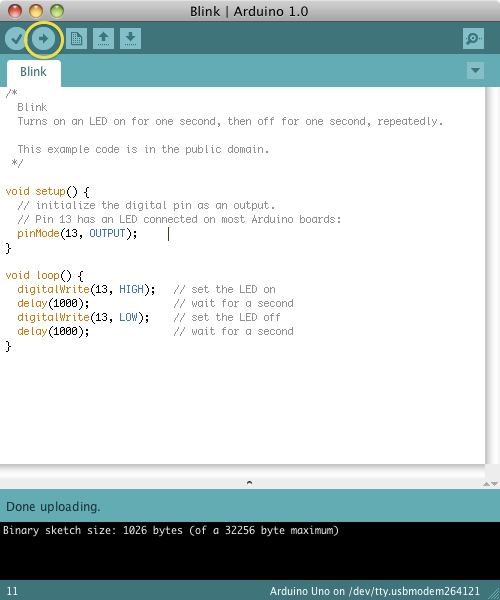
You should then see one of the lights on the board start flashing away (again highlighted):

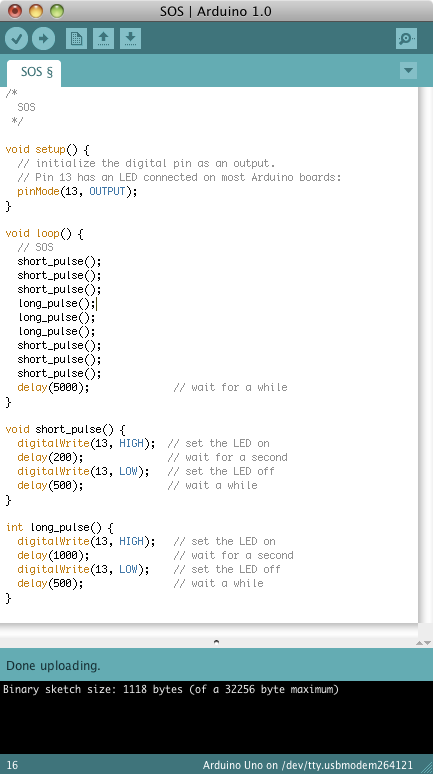
We can now start hacking away at the code. For example we can make the light blink out an SOS signal! The code is basically standard C. The Arduino IDE does some funky preprocessing which lets you get away without including a bunch of header files, but as I understand it it’s really just C underneath.

Here’s my SOS code:

/*
  SOS
 */

void setup() {                
  // initialize the digital pin as an output.
  // Pin 13 has an LED connected on most Arduino boards:
  pinMode(13, OUTPUT);     
}

void loop() {
  // SOS
  short_pulse();
  short_pulse();
  short_pulse();
  long_pulse();
  long_pulse();
  long_pulse();
  short_pulse();
  short_pulse();
  short_pulse();
  delay(5000);              // wait for a while
}

void short_pulse() {
  digitalWrite(13, HIGH);  // set the LED on
  delay(200);              // wait for a second
  digitalWrite(13, LOW);   // set the LED off
  delay(500);              // wait a while
}

int long_pulse() {
  digitalWrite(13, HIGH);   // set the LED on
  delay(1000);              // wait for a second
  digitalWrite(13, LOW);    // set the LED off
  delay(500);               // wait a while
}

Hit Upload again and you should see the light blinking an SOS at you! Embedded programming shouldn’t be this easy it isn’t right!! 🙂

If you’re in the UK you can get an Arduino Uno from Farnell here.

VisualStudio write UNIX style linefeeds using StreamWriter/WriteLine

Like so:

StreamWriter^ sw = gcnew StreamWriter("filename");
sw->NewLine = "\n";
sw->WriteLine("Line data");

Serial IO in VisualStudio 2011 / C++

I needed to hack together a quick windows application to read data over a serial port and write it to a file. Unfortunately I think VisualStudio is probably still the best way of writing Win32 GUI apps. However I’ve not really used VisualStudio since the VisualStudio.net beta, and most of the stuff I did before that was on VisualStudio 6.

Man Microsoft have really murdered C++… are these proprietary garbage collection extensions all over the place? I couldn’t see a way of writing a pure C++, unmanaged GUI app in VS 2011…

Anyway, to get Serial IO working in a GUI application I needed to add the following methods, these were all added to the Form itself, like I say this was a quick hack:

public:
	// members
	String^ comport;
	String^ dump_filepath;
	String^ current_filename;
	SerialPort^ serialn;

	// initalise serial port
	void init_acquire() {
		int baudRate=9600;

		serialn = gcnew SerialPort(comport, baudRate);

		serialn->ReadTimeout = 50;

		serialn->Open();
	}

	// Read from serial port
	String^ acquire() {;
		String^ s;
		try {
			s = serialn->ReadLine();
		}
		catch (TimeoutException ^) { }
		
		return s;
	}

	// Button handler, starts thread
	private: System::Void button1_Click(System::Object^  sender, System::EventArgs^  e) {

		dumped_lines      = 0;
		dumped_file_count = 0;
		dump_filepath = this->drop_location_textbox->Text;
		current_filename = dump_filepath + dumped_file_count + ".txt";

		comport = comport_textbox->Text;

	    ThreadStart ^myThreadDelegate = gcnew ThreadStart(this, &Form1::repeat);
		trd = gcnew Thread(myThreadDelegate);
		trd->IsBackground = true;
		trd->Start();
		dumped_lines = 0;
	}

	// Thread code
	delegate void DelegateThreadTask();
	private: void ThreadTask() {

		// This weirdness is required because setting the TextBox text is not thread safe.
		if (data_textbox->InvokeRequired == false) {
			String ^data = acquire();
			this->data_textbox->Text = this->data_textbox->Text + data;
			//current_filename

			StreamWriter^ sw = gcnew StreamWriter(current_filename,true);

			sw->WriteLine(data);

			sw->Close();

		} else {
			DelegateThreadTask ^myThreadDelegate = gcnew DelegateThreadTask(this,&Form1::ThreadTask);
			this->Invoke(myThreadDelegate);			
		}
	}

	// Thread loop (reads from serial, dumps to file/textbox.
	private: void repeat() {
		init_acquire();
		while(true) {
			ThreadTask();
			Thread::Sleep(100);
		}
	}

You’ll also need to add the following headers:

	using namespace System::IO::Ports;
	using namespace System::Threading;
	using namespace System::IO;

SDL_BlitSurface causes memory leak on MacOS X

When I use SDL_BlitSurface on Mac OS X it seems to cause a memory leak, it’s probably in some way related to the way I’m using Blit but anyway I needed a quick hack to get round the problem, performance is not really an issue so I just wrote a function to write the points to the screen one by one:

There are a bunch of things this version doesn’t do that SDL_BlitSurface does, so beware. It ignores src_rec (just like SDL_BlitSurface would if it were NULL), and it does no conversion to insure source and dest are the same format (so you’ll have to convert the surfaces first).

void SlowBlitSurface(SDL_Surface *source,SDL_Rect *src_rec,SDL_Surface *dest,SDL_Rect *dest_rec) {

  int sbpp = source->format->BytesPerPixel;
  int dbpp = dest->format->BytesPerPixel;
  for(size_t x=0;x<source->w;x++) {
    for(size_t y=0;y<source->h;y++) {
      Uint8 *p = (Uint8 *)source->pixels + (((y * source->w) + x) * sbpp);
      Uint32 pval = *(Uint32 *) p;
      Uint8 *d = (Uint8 *)dest->pixels   + ((((dest_rec->y+y) * (dest->w)) + (dest_rec->x+x)) * dbpp);
      *((Uint32 *) d) = pval;
    }
  }
}