Archive for the ‘Uncategorized’ Category.
April 4, 2017, 7:20 pm
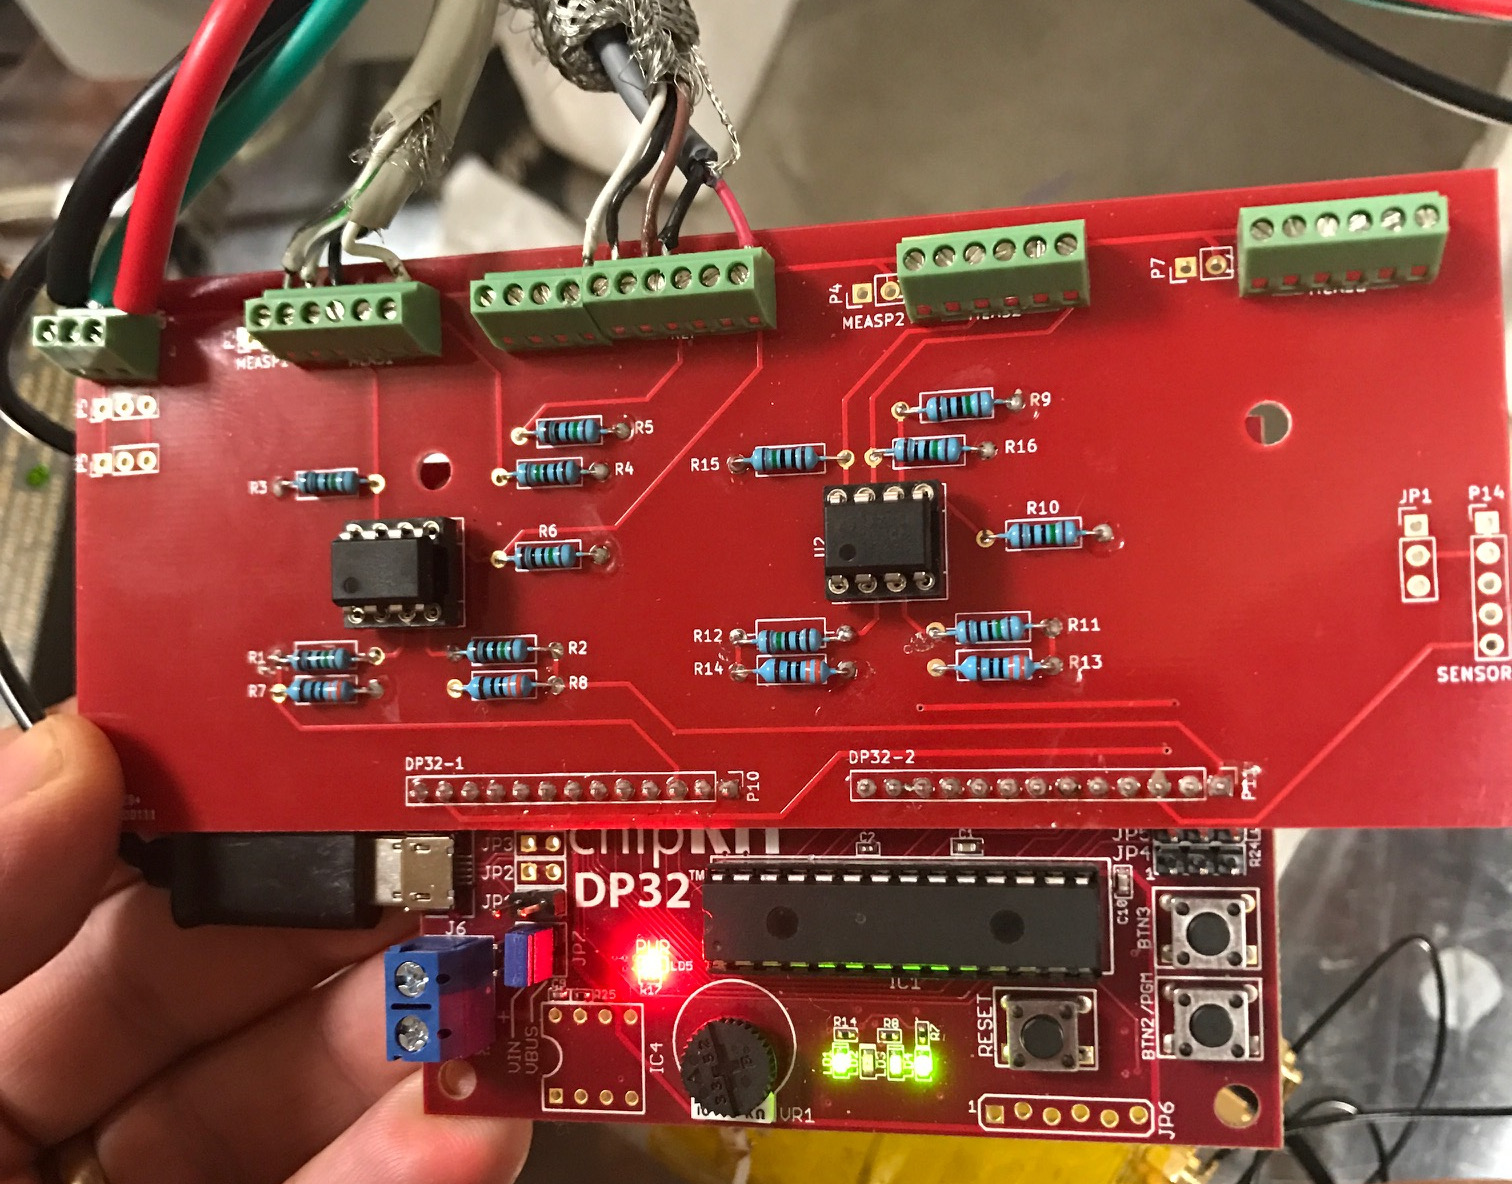
I’ve put together a simple interface for use with Sam’s and Jan’s HP Interferometer code for the ChipKIT 32. It’s really just a layout of the design listed on their site, however avoids some wire-wrapping. You can find the Kicad files and gerbers on github.
I decided to use all through-hole components to make it easy to assemble. In a future revision I might move to SMD, the mounting points need re-positioning. I’d also like to try laying out the PIC32 on the same board. The board however works well for me, and it depends if I get any interest in developing it further. If you’d like one let me know and I’ll put it in my shop.
The board I’ve designed routes power traces to terminal blocks to which the receiver and laser head are attached. This helps simplify wiring.
April 3, 2017, 5:28 pm
These are my notes on building Sam and Jan’s interferometer signal processing firmware for the Chipkit DP32.
First download the firmware, this is the version I used: http://www.repairfaq.org/sam/uMD1/uMD1_FW_v56.10.ino (local copy (gz)).
Then install UECIDE, download it here: http://uecide.org/download.php. I used the latest version on Linux (uecide-0.8.8alpha22-linux.zip).
Next in Tools->Plugin Manager select Boards->chipKIT->chipKIT DP32 and then select “install”… wait.
Next in Tools->Plugin Manager select Compilers->PIC32->PIC32 Compiler for MX version 4.5.2 and then select “install”… wait.
Make sure the plugins have actually installed. UECIDE fails silently if you run out of disk space…
Open the ino file above (File-Open) it’ll move it into a scratch area. Select Hardware->Boards->chipKIT->chipKIT DP32
Select Hardware->Compilers->pic32-tools-452
In a text editor open: .uecide/compilers/pic32-tools-452/pic32mx/include/plib.h, comment out line 61 (#include <peripheral/ports.h).
Hit compile, hope for the best.
Remove all the jumpers from the chipKIT 32 board. Reinstall one jumper on JP7 furthest from the terminal block, the position is labeled VBUS.
Plug the board into a USB port. Press Press RESET and PGM buttons at the same time. Release RESET then PGM.
In UECIDE select Hardware->Device and then whichever serial port the chipKIT 32 is connected to.
Select Hardware->Programmers->Upload to chipKIT board via avrdude.
Press “Program”. Hope for the best again.
If everything has worked correctly you should be able to see the chipKIT throwing out numbers in serial console. Seemly baudrate settings don’t matter.
February 28, 2017, 3:02 am
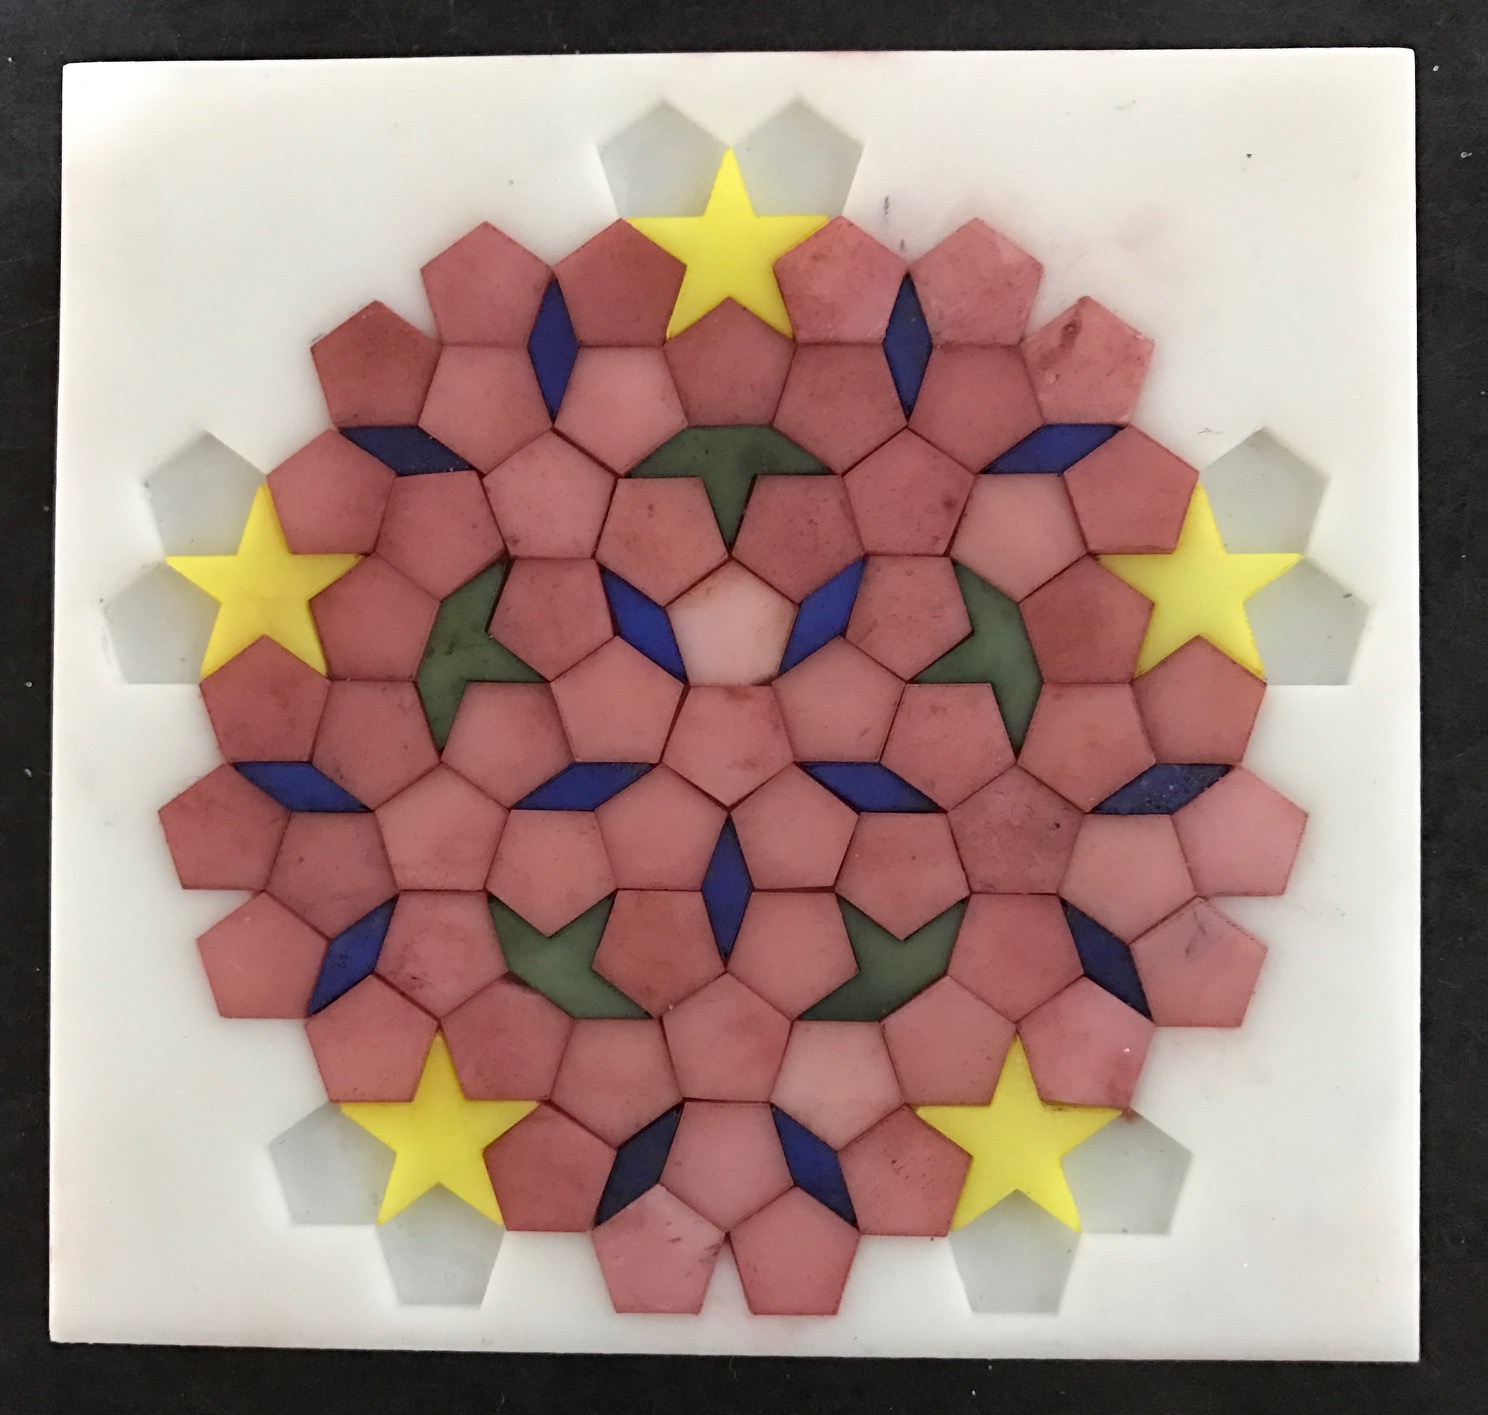
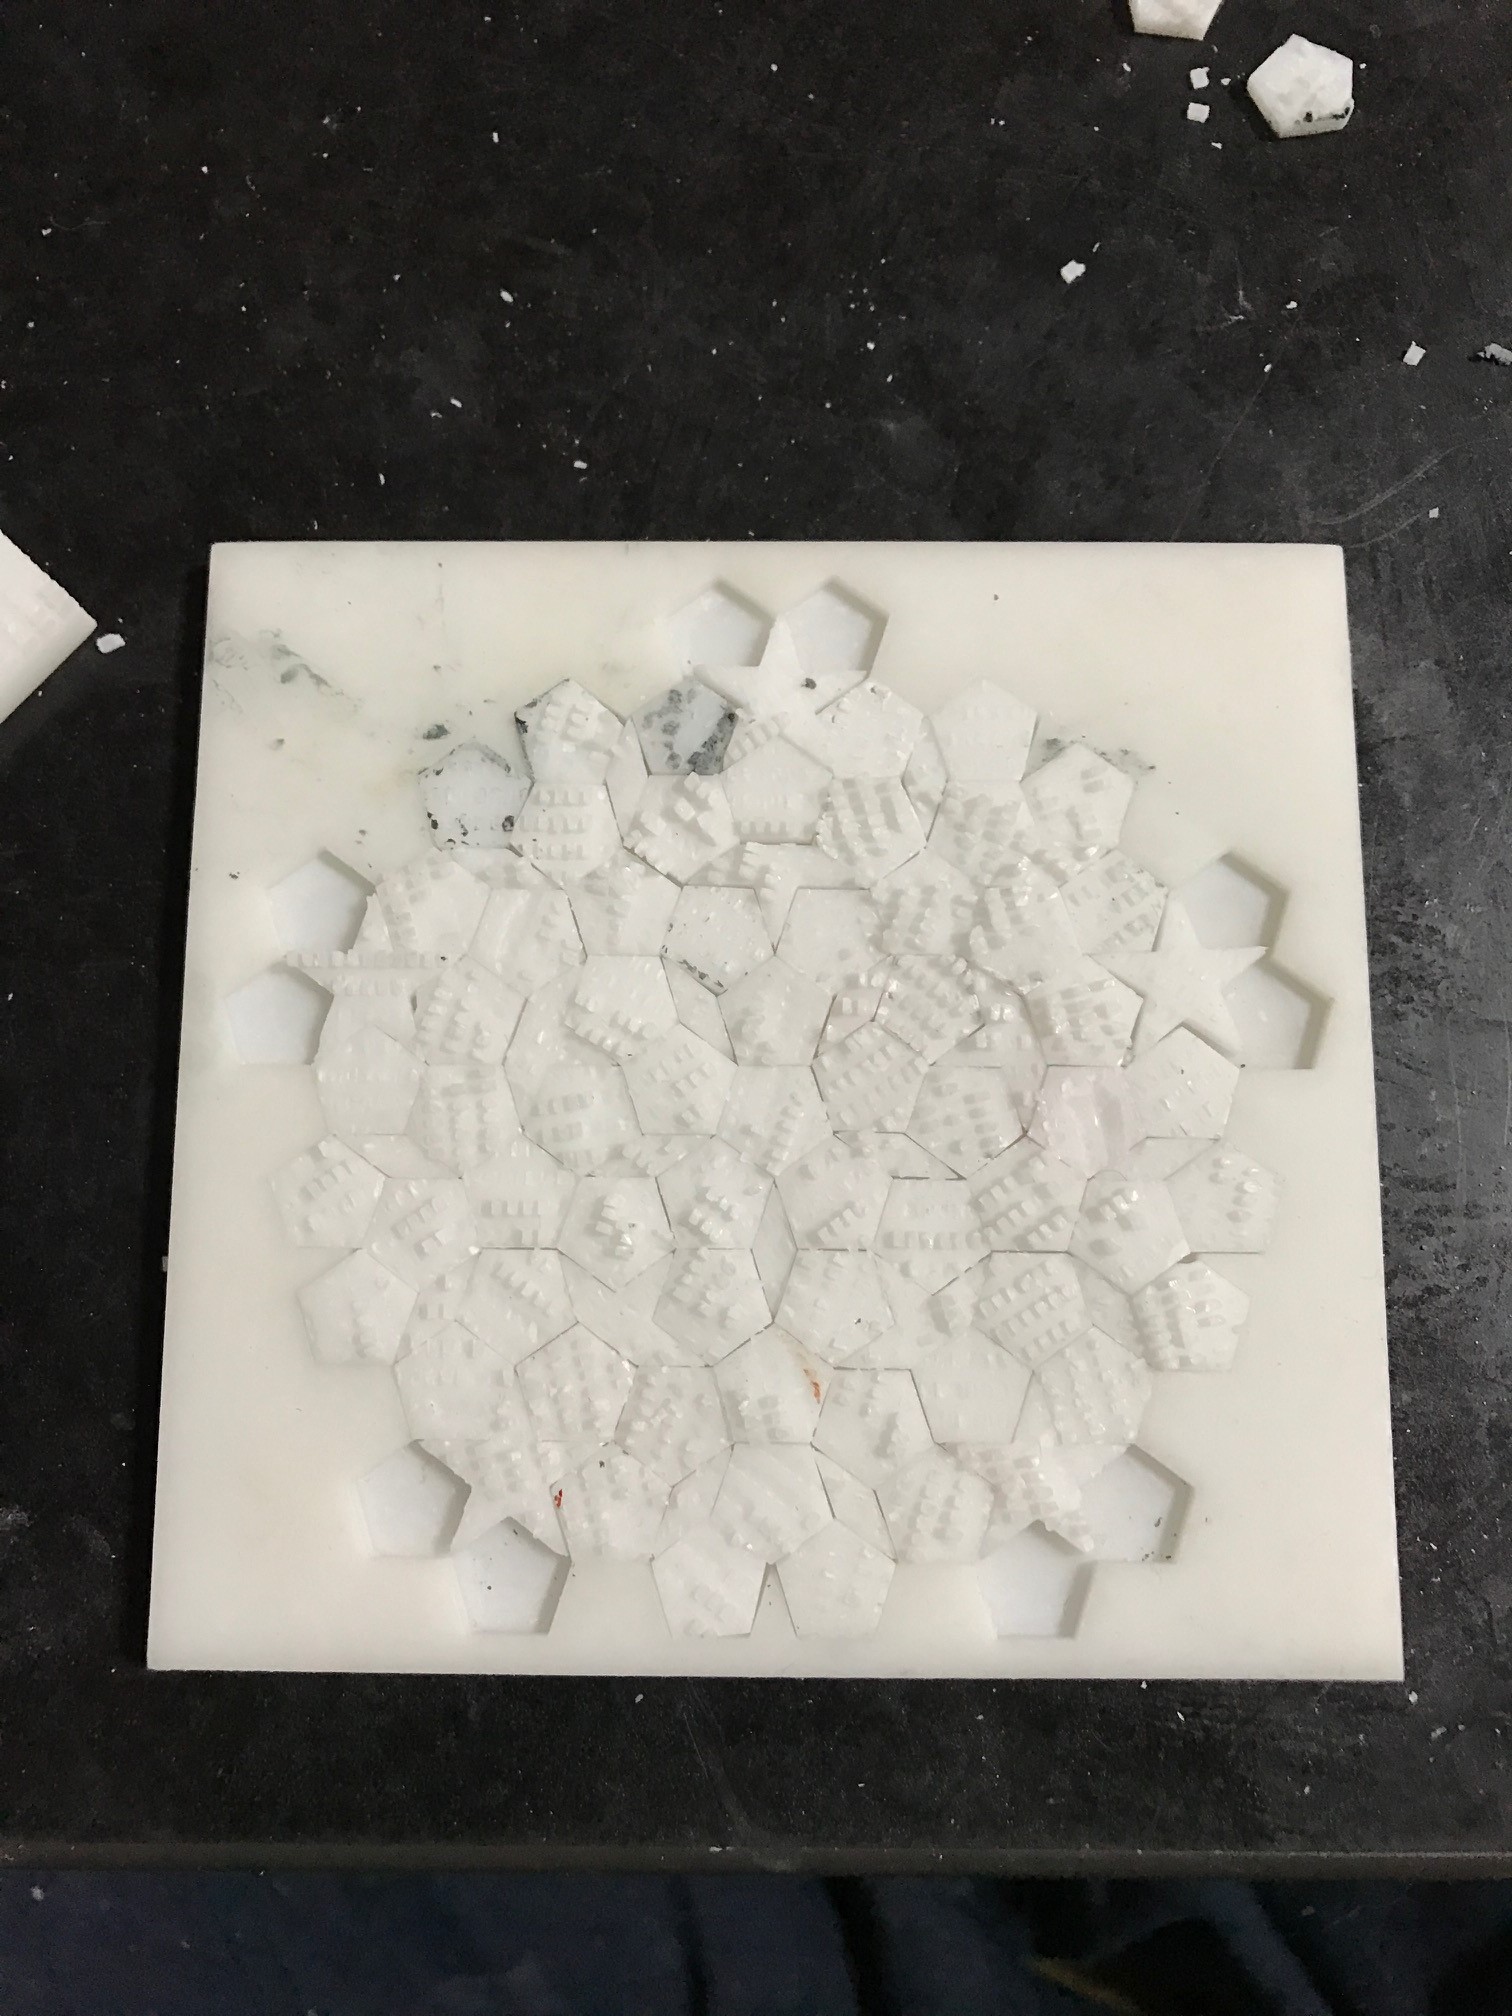
 I’ve been working on a small tile puzzle “thing” based on a penrose (aperiodic) tiling. I used the tiling on the wikipedia page for this first test run. I’m not sure if I’ll actually do another revision, but thought I should probably document what worked and what didn’t.
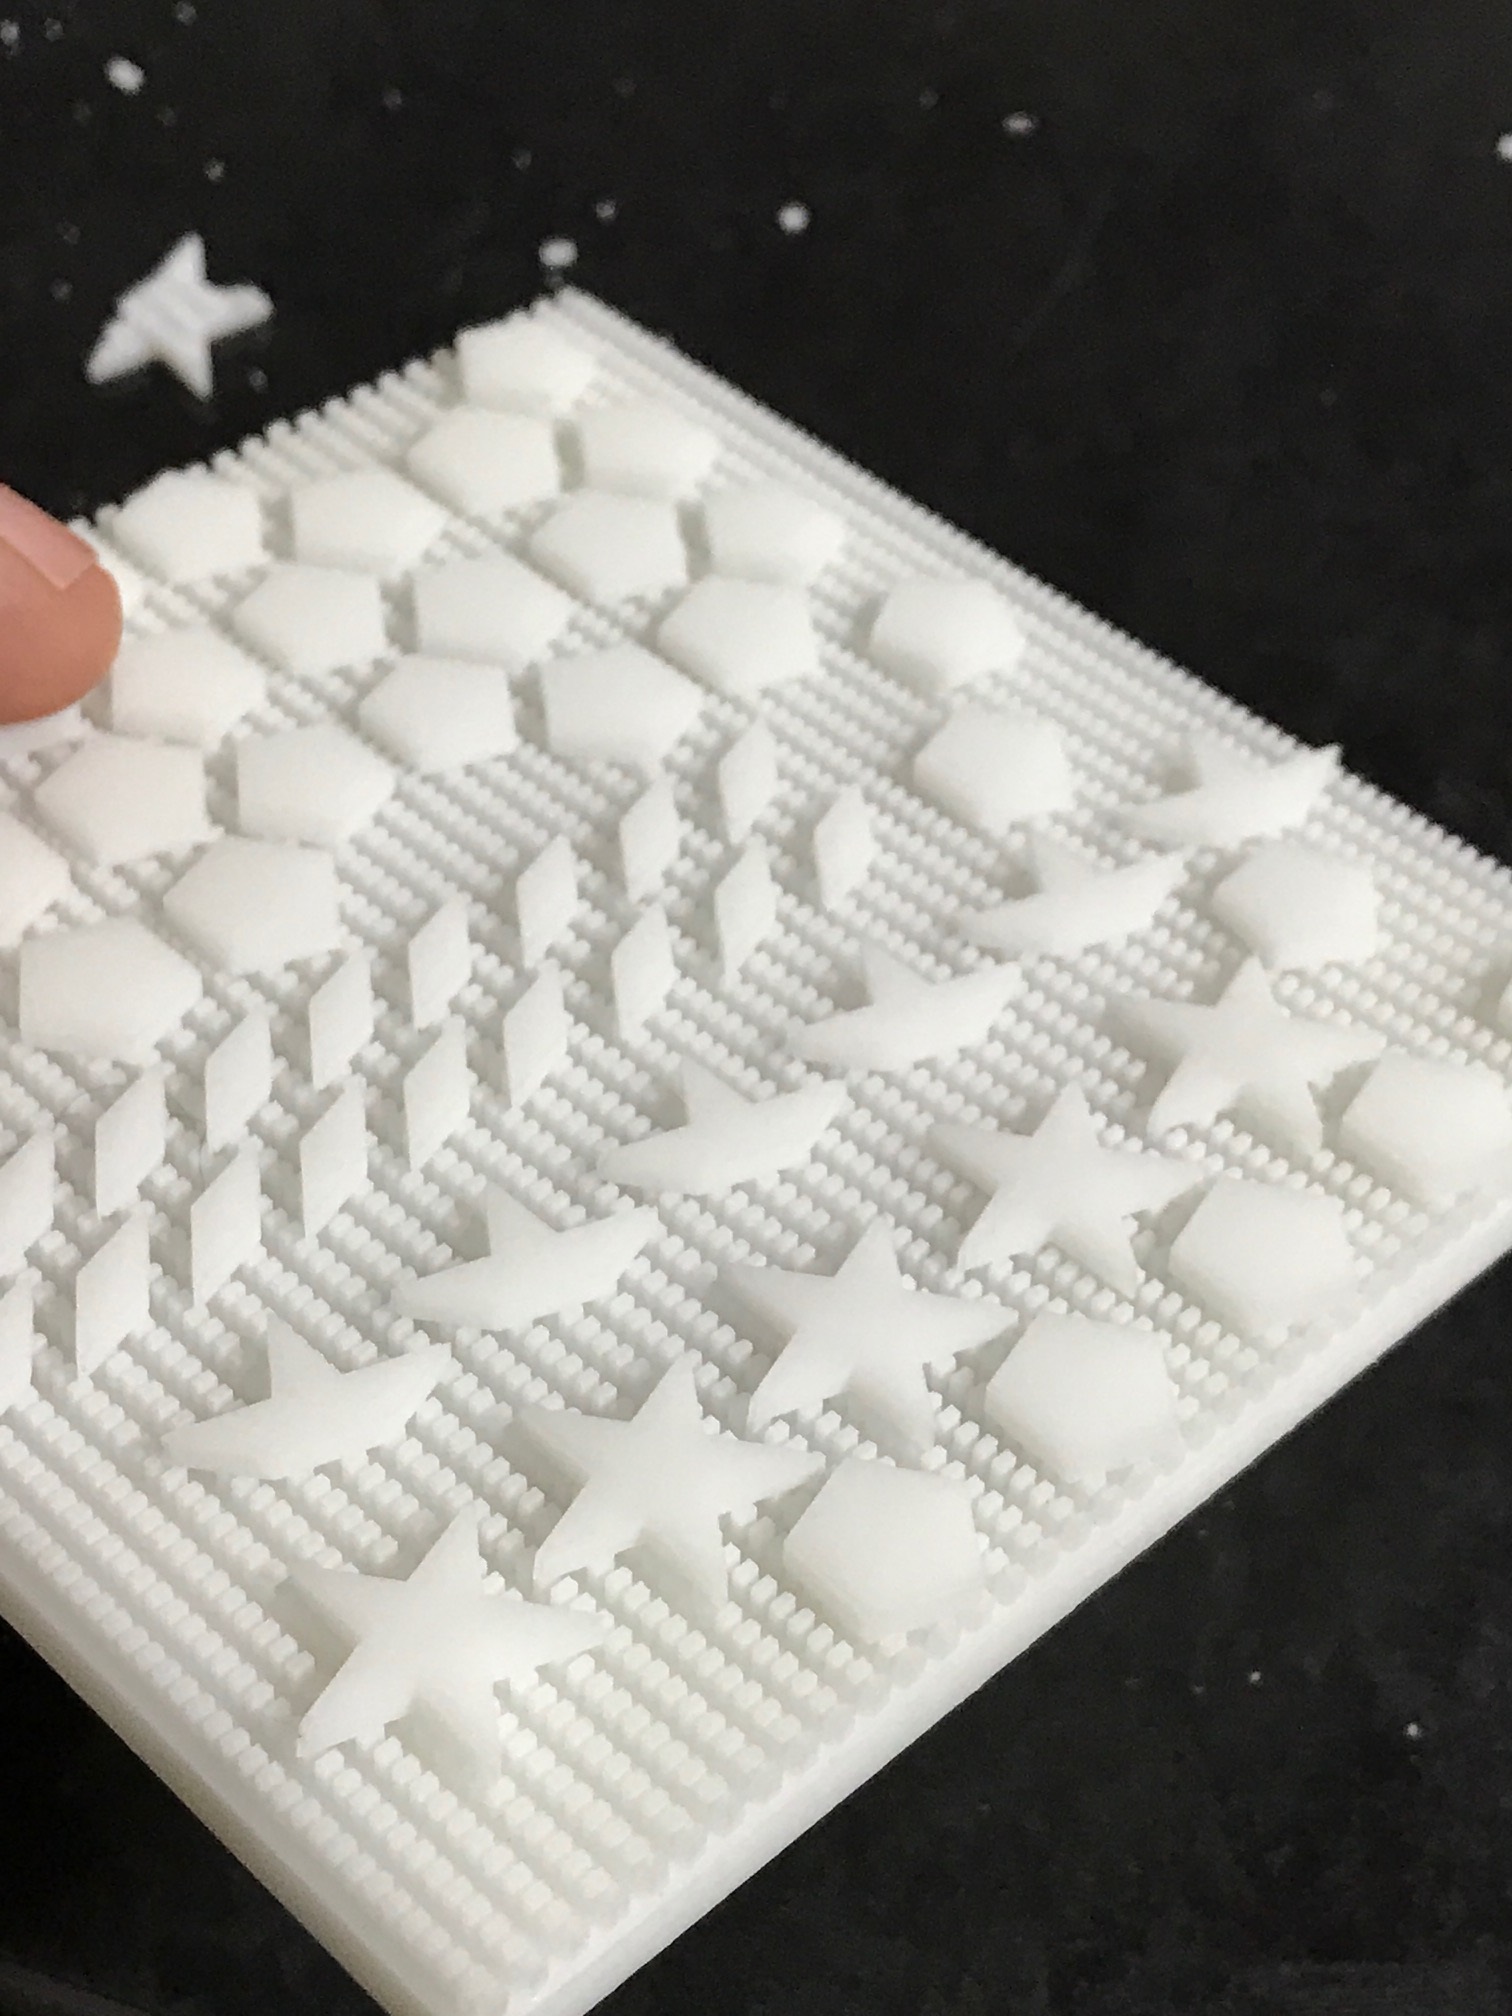
Firstly, I decided to fabricate the whole puzzle as a single part. The top of the part contains the frame into which the tiles sit. The tiles themselves are attached to the back of the frame and need to be sliced off. They are supported by a series of pillers 2x1mm in size and 2mm tall. I figured they would be easy to hack off. I was wrong, this was horribly difficult. I opted to fabricate the puzzle as one part because Itead (also most other SLA printing services) charge a fixed fee per part. As there are so many parts, creating each tile separately would be very expensive (probably 100 to 200USD in total).
I should most likely use either fewer, or different pillars to support the parts, or try a different strategy. Perhaps laser cutting this model would also be a better option.
There were a couple of thing that worked out well with the pillars though. I was surprised that they all fabricated correctly. No pillars were joined together under the parts. They didn’t cause any issues during printing, and it’s interesting to note that you can create complex void like this…
 Hacking all the parts off took an age. The “stars” were also difficult to remove without breaking, but with some practice they could be removed relatively easily.
After removing the parts I did a fit test. As it turns out about 30% of the pentagons were the wrong size (about 1mm too big). Filing these down took a long, long time. I believe this is a design error on my part, the majority of parts had no issues. I was concerned that they might not fit in the frame as I’d given no tolerance in the design to allow for fabrication differences. The tiles were design to exactly fit in the frame with no extra space.
You can see in the fit test to the right that hunks of the pillars remained on the parts. Each part therefore needed to be filed down separately to get it flat. This also took much longer than I’d like and leaving me looking for better solutions.
Overall though, this was a reasonably successful experiment. I’ll be thinking about how to move forward, and if 3D printing is really the best option or if other methods might be better.
February 27, 2017, 6:58 pm

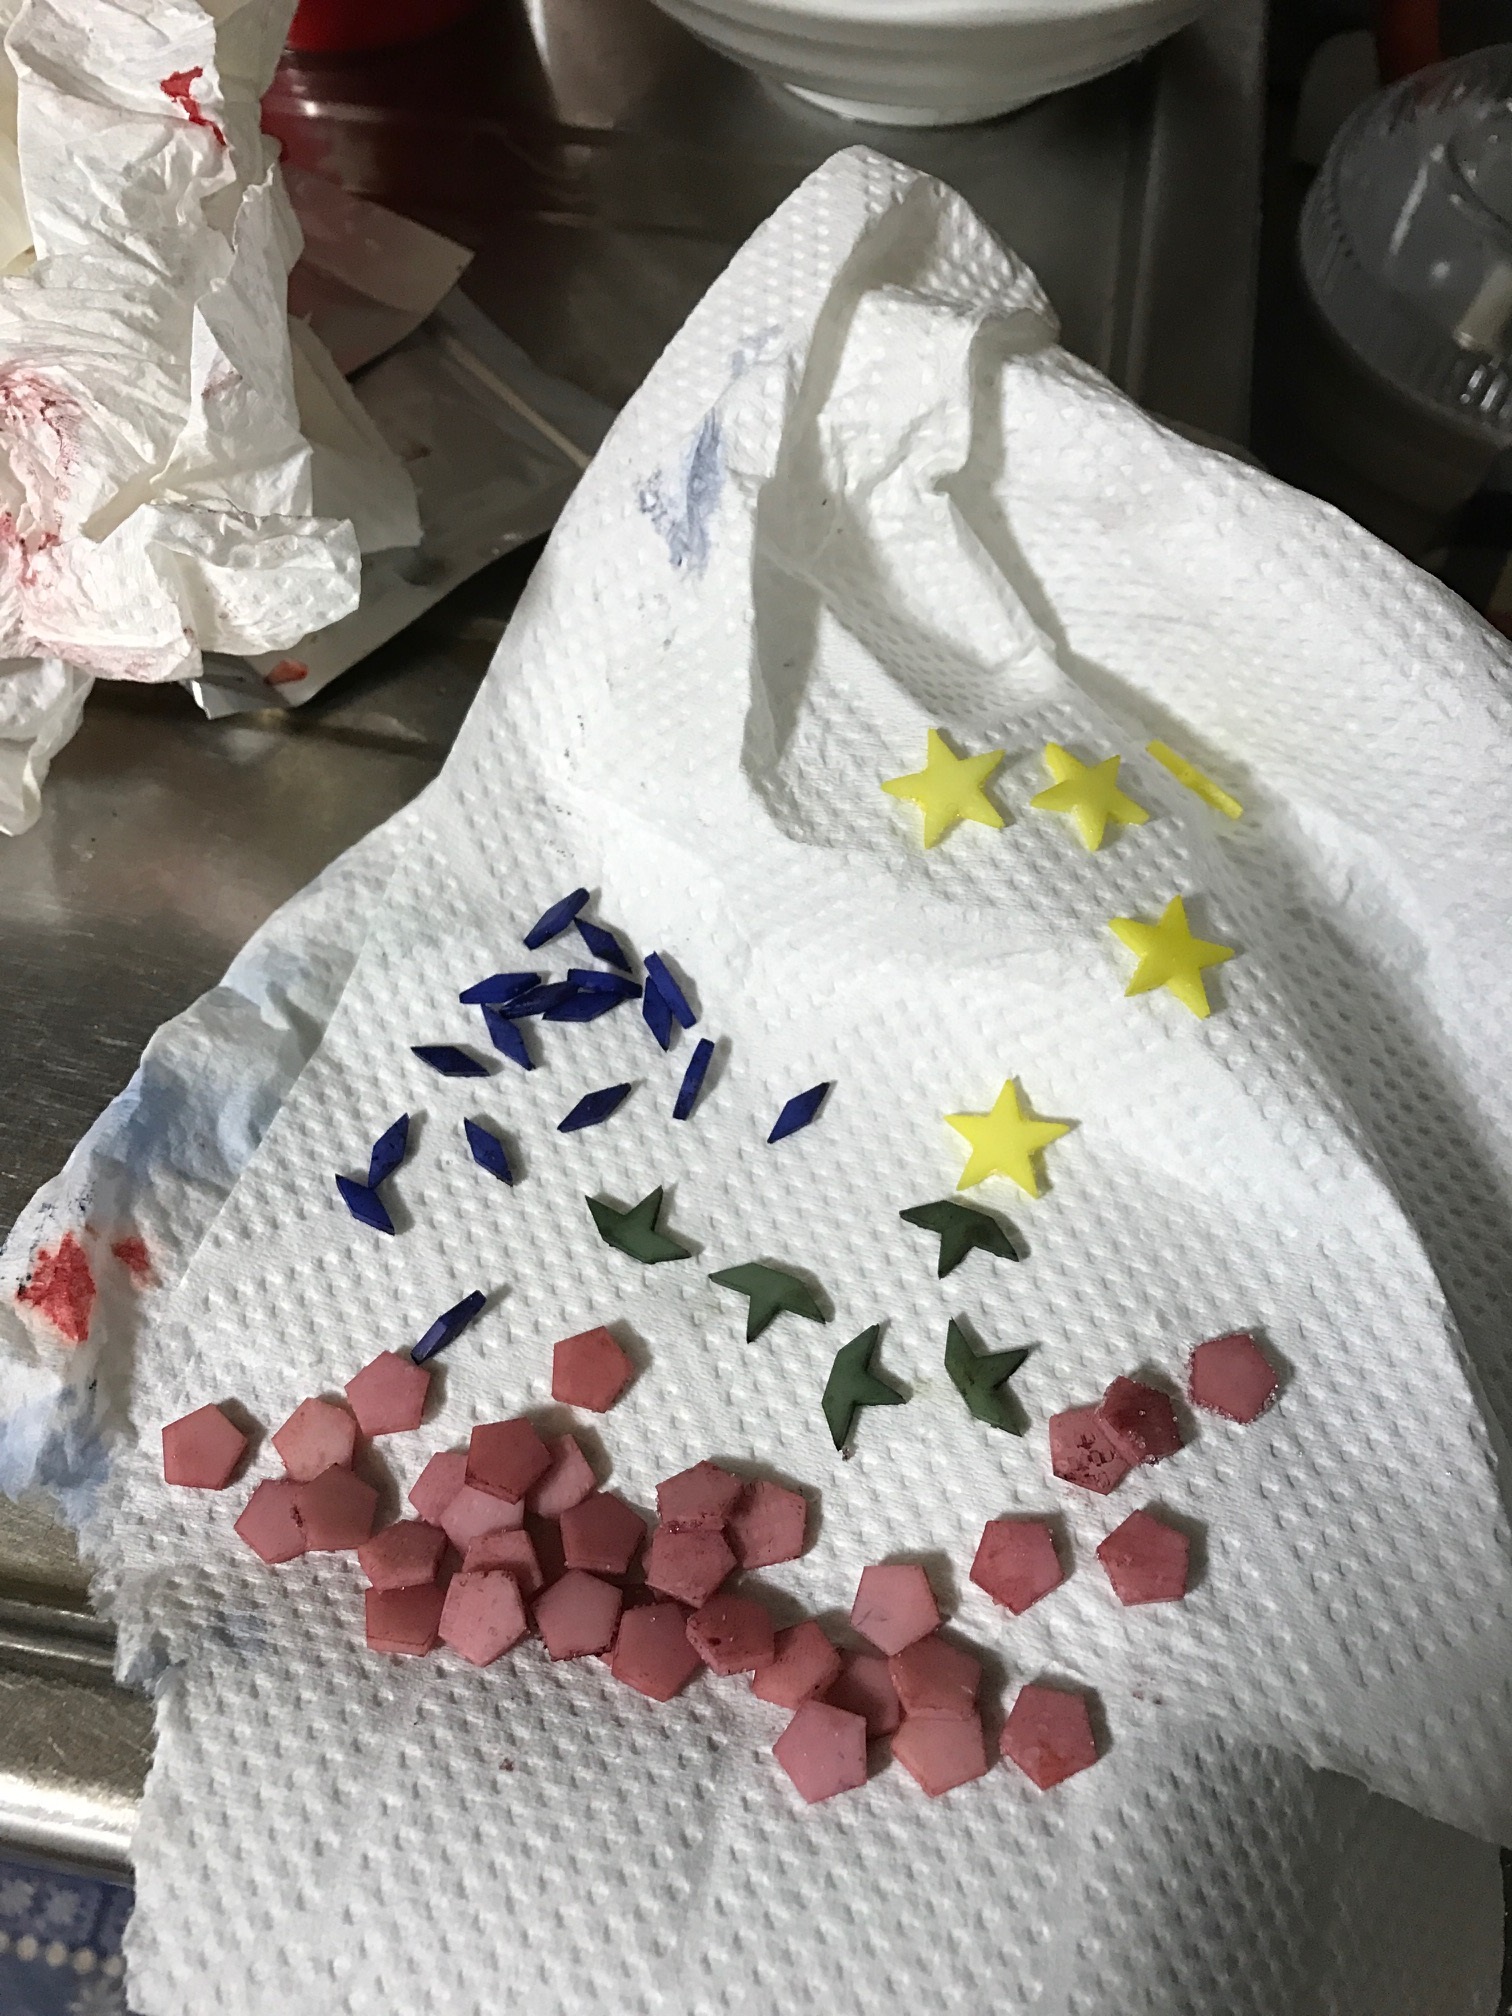
 I wanted to color some 3D printed parts for the project shown above. This post documents my first crack at dying SLA printed parts, and what I plan to try next time. Overall, the results were reasonable, however some colors worked better than others. The parts I used were SLA printed by Itead studios.
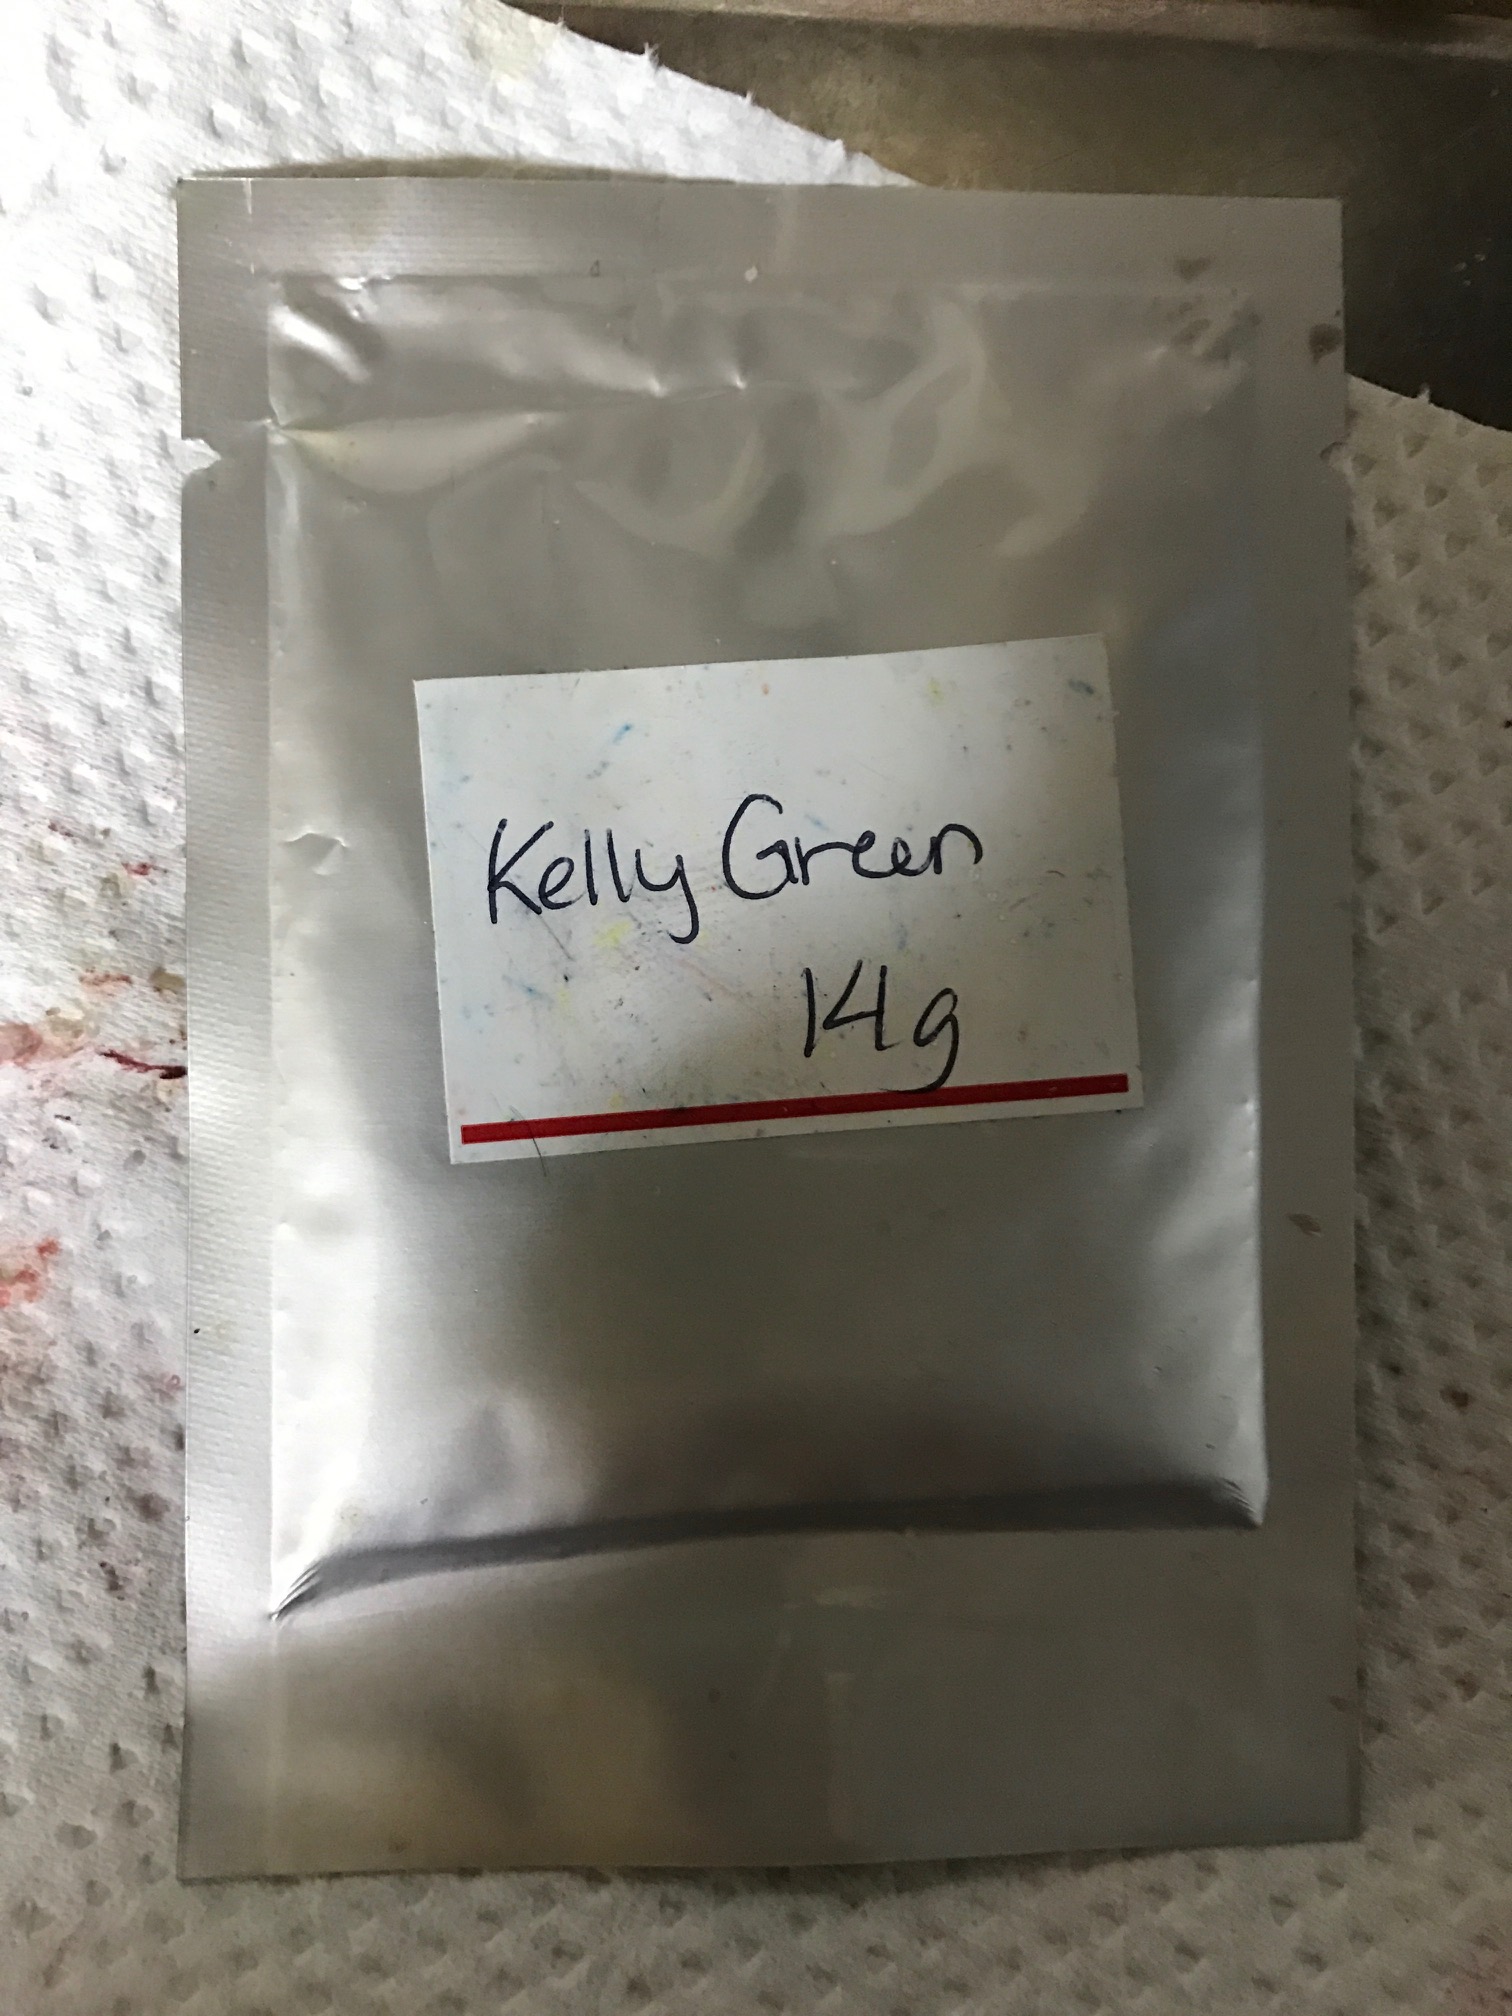
I used “rit” fabric dying powder, which I purchased on eBay. The power came in 14g packets. I used Cardinal Red, Kelly Green, Yellow and Navy Blue. The instructions provided were naturally designed for use with fabric, so I mostly just guessed. I used half the packet in a small beaker with 28ml of boiling water.
I threw the parts in stirred them around a bit with a tooth pick. In all cases there was some dye powder left in the bottom. I left the parts for about an hour. The navy blue and green parts seemed to dye really well. The yellow and red less so. I added the rest of the powder to the red and yellow parts and some more hot water. However the red parts never seemed to really absorb sufficient dye. This might be because there were 4 or 5 times the quantity of parts. Or it could just be that the parts absorb the red dye poorly…
After I was reasonably satisfied that the parts had absorbed all the dye they were going to I emptied the parts out on to some kitchen towel. I rubbed them clean of the remaining dye powder and left them for a couple of minutes to dry before working with them further.
The process feels like its a partial success. I’m going to try some different dyes (hopefully ones I don’t have to order from Canada on eBay). One thing I was concerned about was that heating and cooling the parts would cause them to absorb water, warp, or otherwise deform. This doesn’t seem to be the case, and least if it is, it’s not significant with in the dimensions I’m working with.
