Armonica update
DISCLAIMER: I’m currently working on a seed stage sequencing related project. So, keep that in mind when evaluating my comments. And get in touch ([email protected]) if this might be of interest.
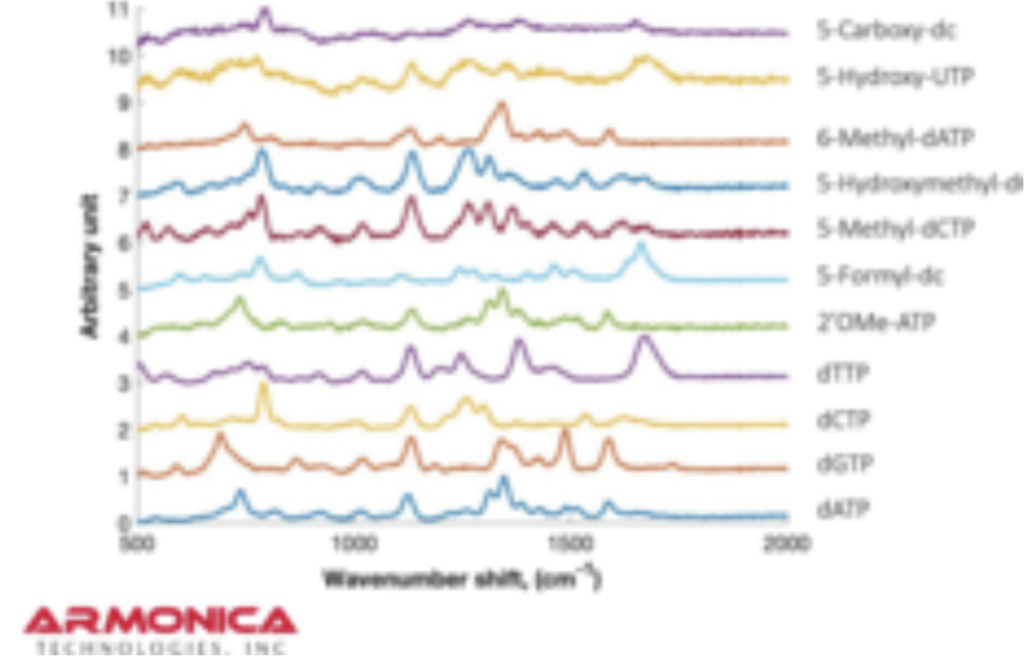
There’s a new Genomeweb article on Armonica Technologies. So I figured it was probably time to revisit the approach, which I’d previously covered. The Genomeweb article is pretty vague, featuring one very blurry plot:
But it turns out they have a couple of posters on their website from AGBT that add more context. The following shows dNTPs (nucleotides free in solution). The idea is that the Raman spectra gives a characteristic signal for each base type.
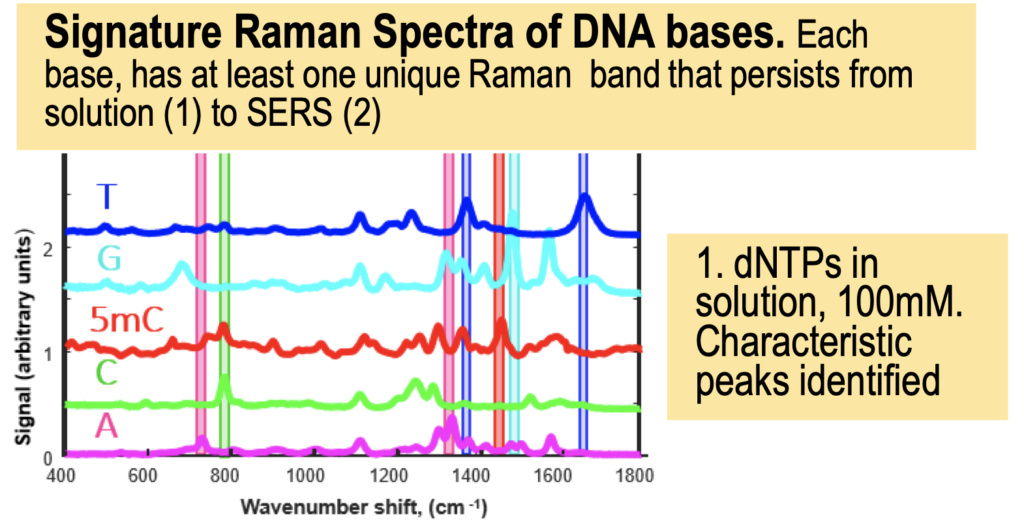
The Genomeweb plot expands on this to show different base modifications. The individual dNTP traces show characteristic differences, but given that these are single traces (perhaps averaged over the surface, but I suspect not over experiments) it’s difficult to understand how much experimental variation there is. The poster does show traces under two different conditions (in solution versus dry monolayer). We can combine these plots and see how consistent the traces are between conditions:

In the above I’ve placed the traces side-by-side. For the most part the traces match pretty well, certainly A and T traces look similar. However the C and G traces don’t look as good. I’ve marked locations where peaks differ (red arrows). Without more to go on it’s difficult to come to a strong conclusion. But ultimately the consistency of these traces may limit accuracy.
From what I can tell this is the best data they have presented, there’s nothing from nucleotides on strands. Slowing the translocation of strands would be critical for this. In their other poster they make the following statement “Molecule penetration over the 5 μm wide barrier takes around 2.5 s for as-fabricated roof. Speed ~2 μm/s (>160 ms per base).”. 160 milliseconds would probably be enough time to get a single molecule optical readout. But the numbers don’t quite make sense to me… and suggest that this should be 160 microseconds. That would be faster than any single molecule optical imaging system that I’m aware of.
Beyond this we can make some guesses about what a platform built around this approach would look like. Taking the full spectra of each pore would be problematic. Hamamatsu do some really neat spectrometer modules, but I suspect having a spectrometer for each pore would be unrealistic.
I’d therefore imaging that you’d pick a number of peak locations which uniquely identify base types (as shown by the vertical bars in the Raman spectra above). Traditionally for these kinds of single molecule experiments you’d use sCMOS cameras. For the locations shown in the plot above you’d need 6 cameras, simultaneously monitoring pores during translocation. Typically these cameras cost >$10000 (for the cheapest models). Cameras will need to be fixed, monitoring a single region in real time. This will limit throughput.
As we’ve seen with PacBio however, it’s possible to integrate much of this onto a chip based platform.
Conclusion
Oxford Nanopore showed base identification in solution back in 2009. The first external data from that platform was publicly shown in 2014. So I’m skeptical of the statement that “If someone gave us $20 million tomorrow, we’d have a working product in two years.” as suggested in the Genomeweb article.
The platform being developed seems somewhat similar to PacBio’s, with an optical readout and realtime monitoring of strands. So at a first pass looking at PacBio numbers, a ~$1000 run cost and ~$500K instrument cost. I can imagine there’s an order of magnitude potential for cost reduction, but difficult to see it being cost competitive with Illumina.
Being able to detect base modifications is certainly interesting, particularly as there appears to be a consensus that base modifications are important for early stage cancer detection. The market for long reads is currently less clear. In the GenomeWeb article they propose that “the company will try to provide long reads with epigenetic information to guide therapy selection”. Which is certainly an important application, but not as large a market as NIPT/cancer screening.
