Reprogramming a ATTINY85 to use an external oscillator using the Arduino IDE
I’d read about using PIC series microprocessors as clock dividers. For a project I’ve been working on I wanted to do the same thing. I find working with PICs pretty painful so I thought I’d use the Attiny85 from a digispark I have.
The process is pretty straightforward, but I wanted to document it here.
In order to reprogram the ATTINY85 to use a different oscillator, you need an AVR programmer. It’s not possible to set the fuses using the digispark bootloader. An Arduino Uno (or a knockoff) can be programmed to be used as a device programmer for other AVRs. The Arduino ISP includes the software to do this under Examples->ArduinoISP.
You can then put a simple header together to attach to the ATTINY85. I recommend picking up a cheap SOIC8 clip from eBay. The wiring required is described here [1].
Here’s my version of this header:

With the ArduinoISP flashed onto your Uno, it’s now possible to reprogram the ATTINY85. The standard Arduino IDE does not include the board support package to do this however. You need to add the following under Preferences->Additional Board Manager URLs:
https://raw.githubusercontent.com/damellis/attiny/ide-1.6.x-boards-manager/package_damellis_attiny_index.json
With this installed you should be able to select the attiny under Tools->Boards. Also select Arduino as ISP as the programmer. You may need to reflash the bootloader to set the fuses (not sure if this is required or not).
In my case, I also wanted to use an External Oscillator (not external crystal) with the ATTINY85. The damellis package does not include support for this so I had to add it to boards.txt. The location of this file may differ on your system. On my Linux PC it was at:
~/.arduino15/packages/attiny/hardware/avr/1.0.2/boards.txt
I was using a 10MHz external oscillator, so I added the following:
ATtinyX5.menu.clock.external20=External Osc 10MHz
ATtinyX5.menu.clock.external20.bootloader.low_fuses=0xf0
ATtinyX5.menu.clock.external20.bootloader.high_fuses=0xdf
ATtinyX5.menu.clock.external20.bootloader.extended_fuses=0xff
ATtinyX5.menu.clock.external20.build.f_cpu=10000000L
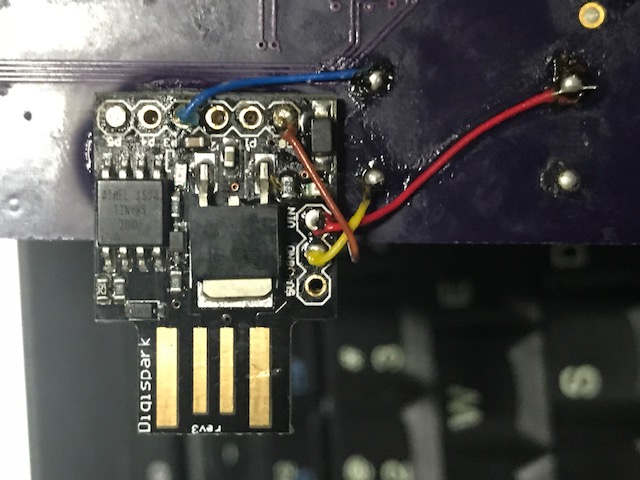
I also need to wire up the oscillator of course. You can connect it to pin P3 on the digispark header. Of course, the oscillator and digispark will also need power. Here’s my board, all hacked up, and ready to go:
Notes
[1] Backup of wiring image from: here.
