Penrose Puzzle – Lessons Learned from Rev 0
 I’ve been working on a small tile puzzle “thing” based on a penrose (aperiodic) tiling. I used the tiling on the wikipedia page for this first test run. I’m not sure if I’ll actually do another revision, but thought I should probably document what worked and what didn’t.
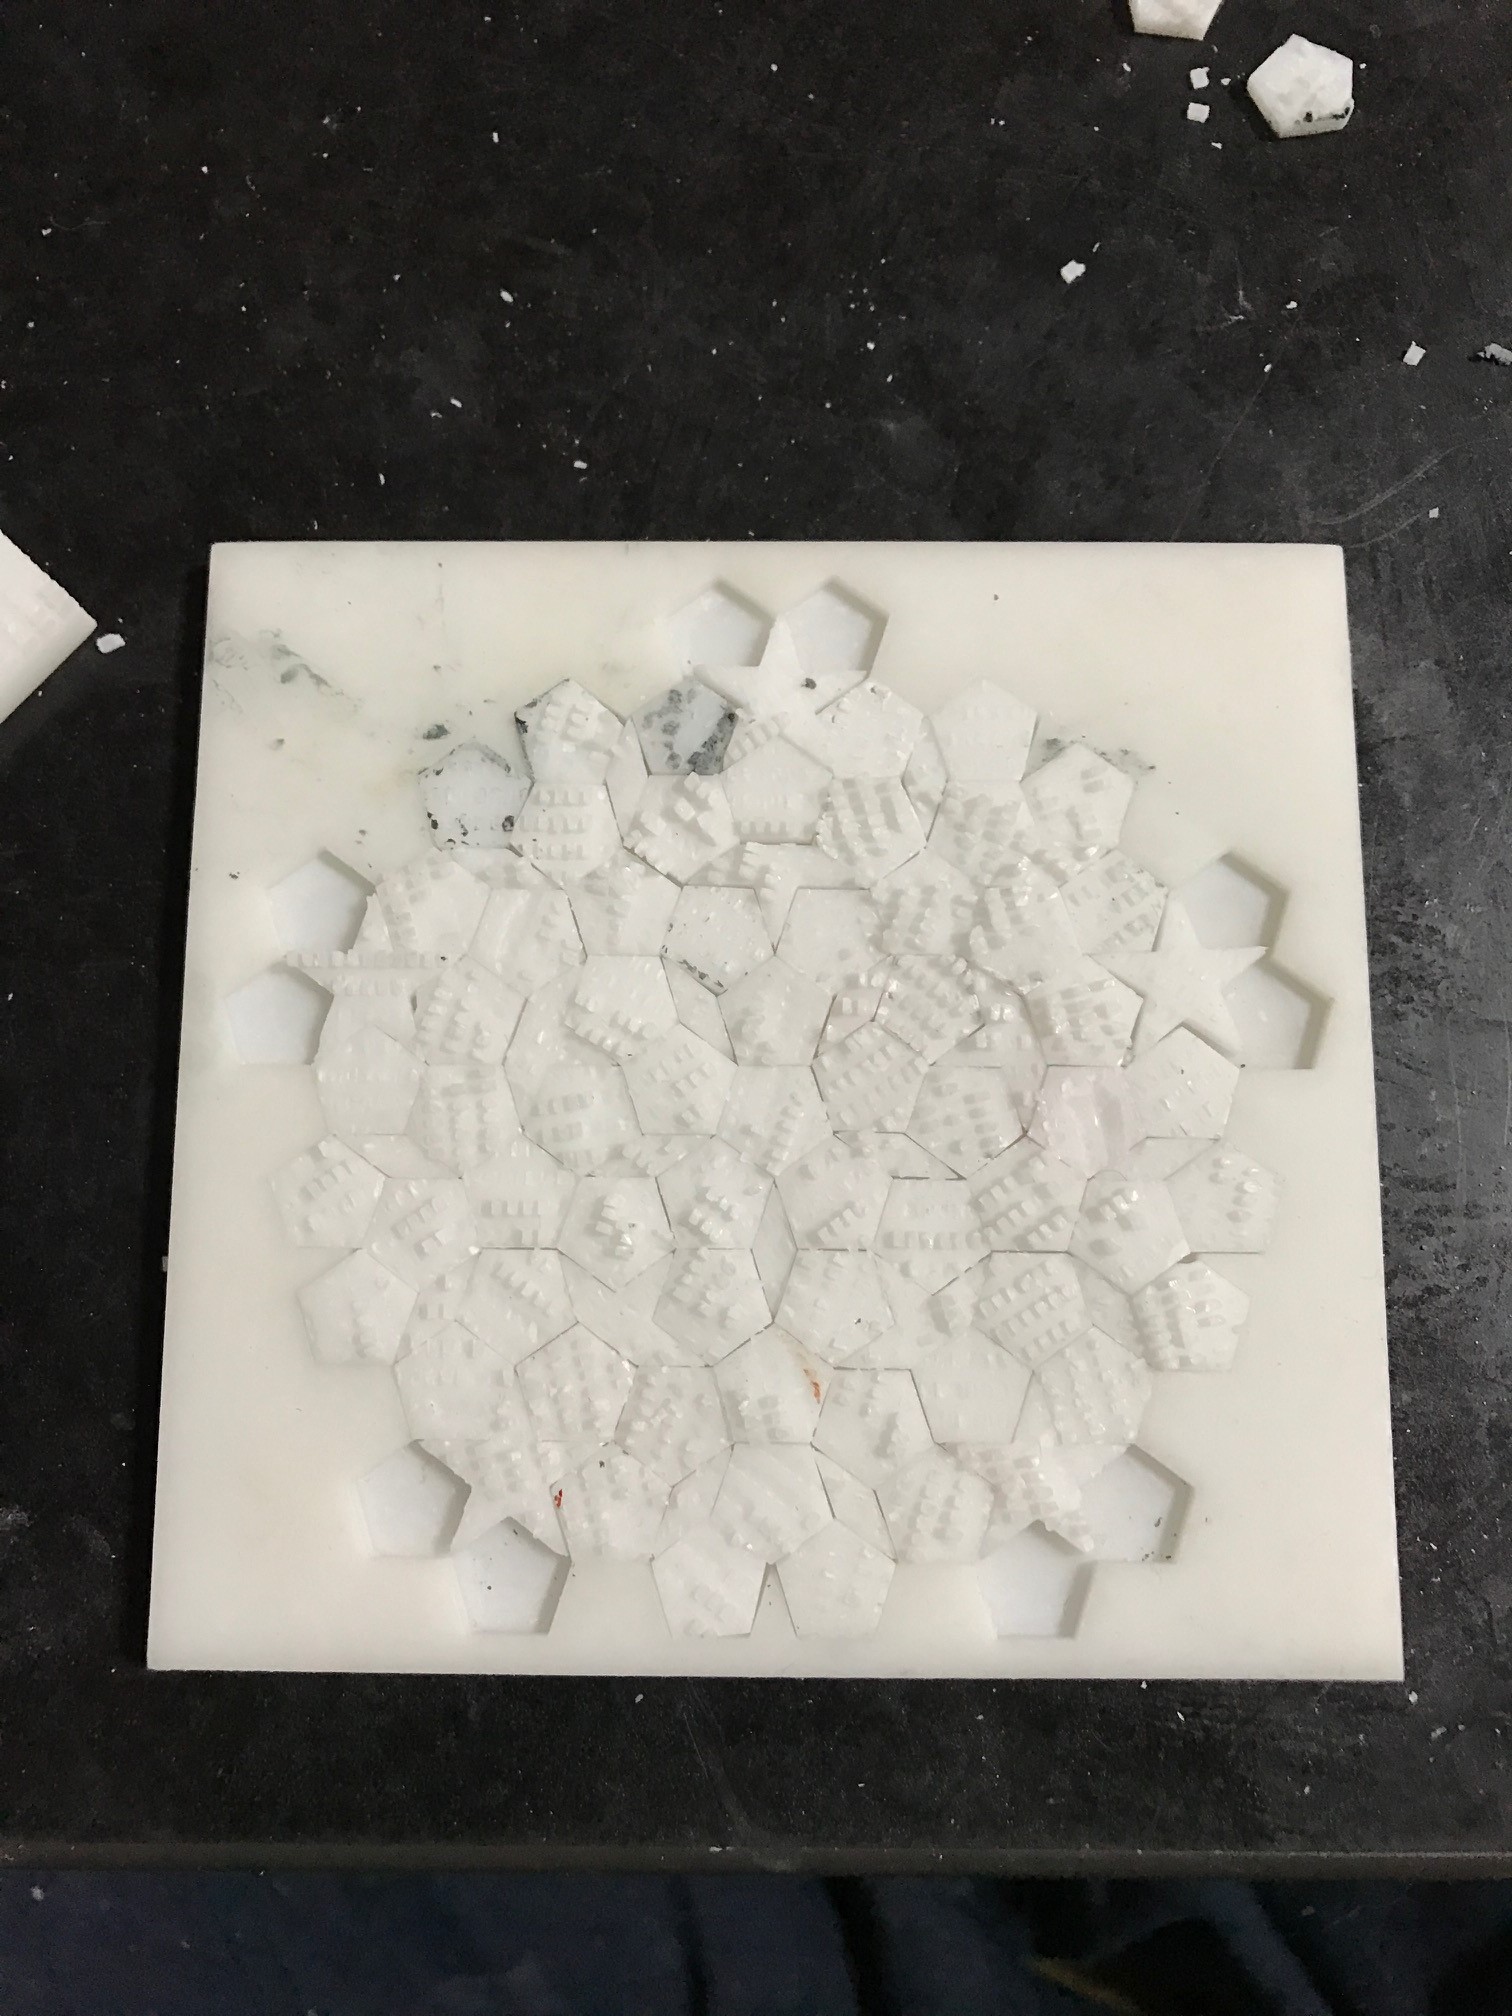
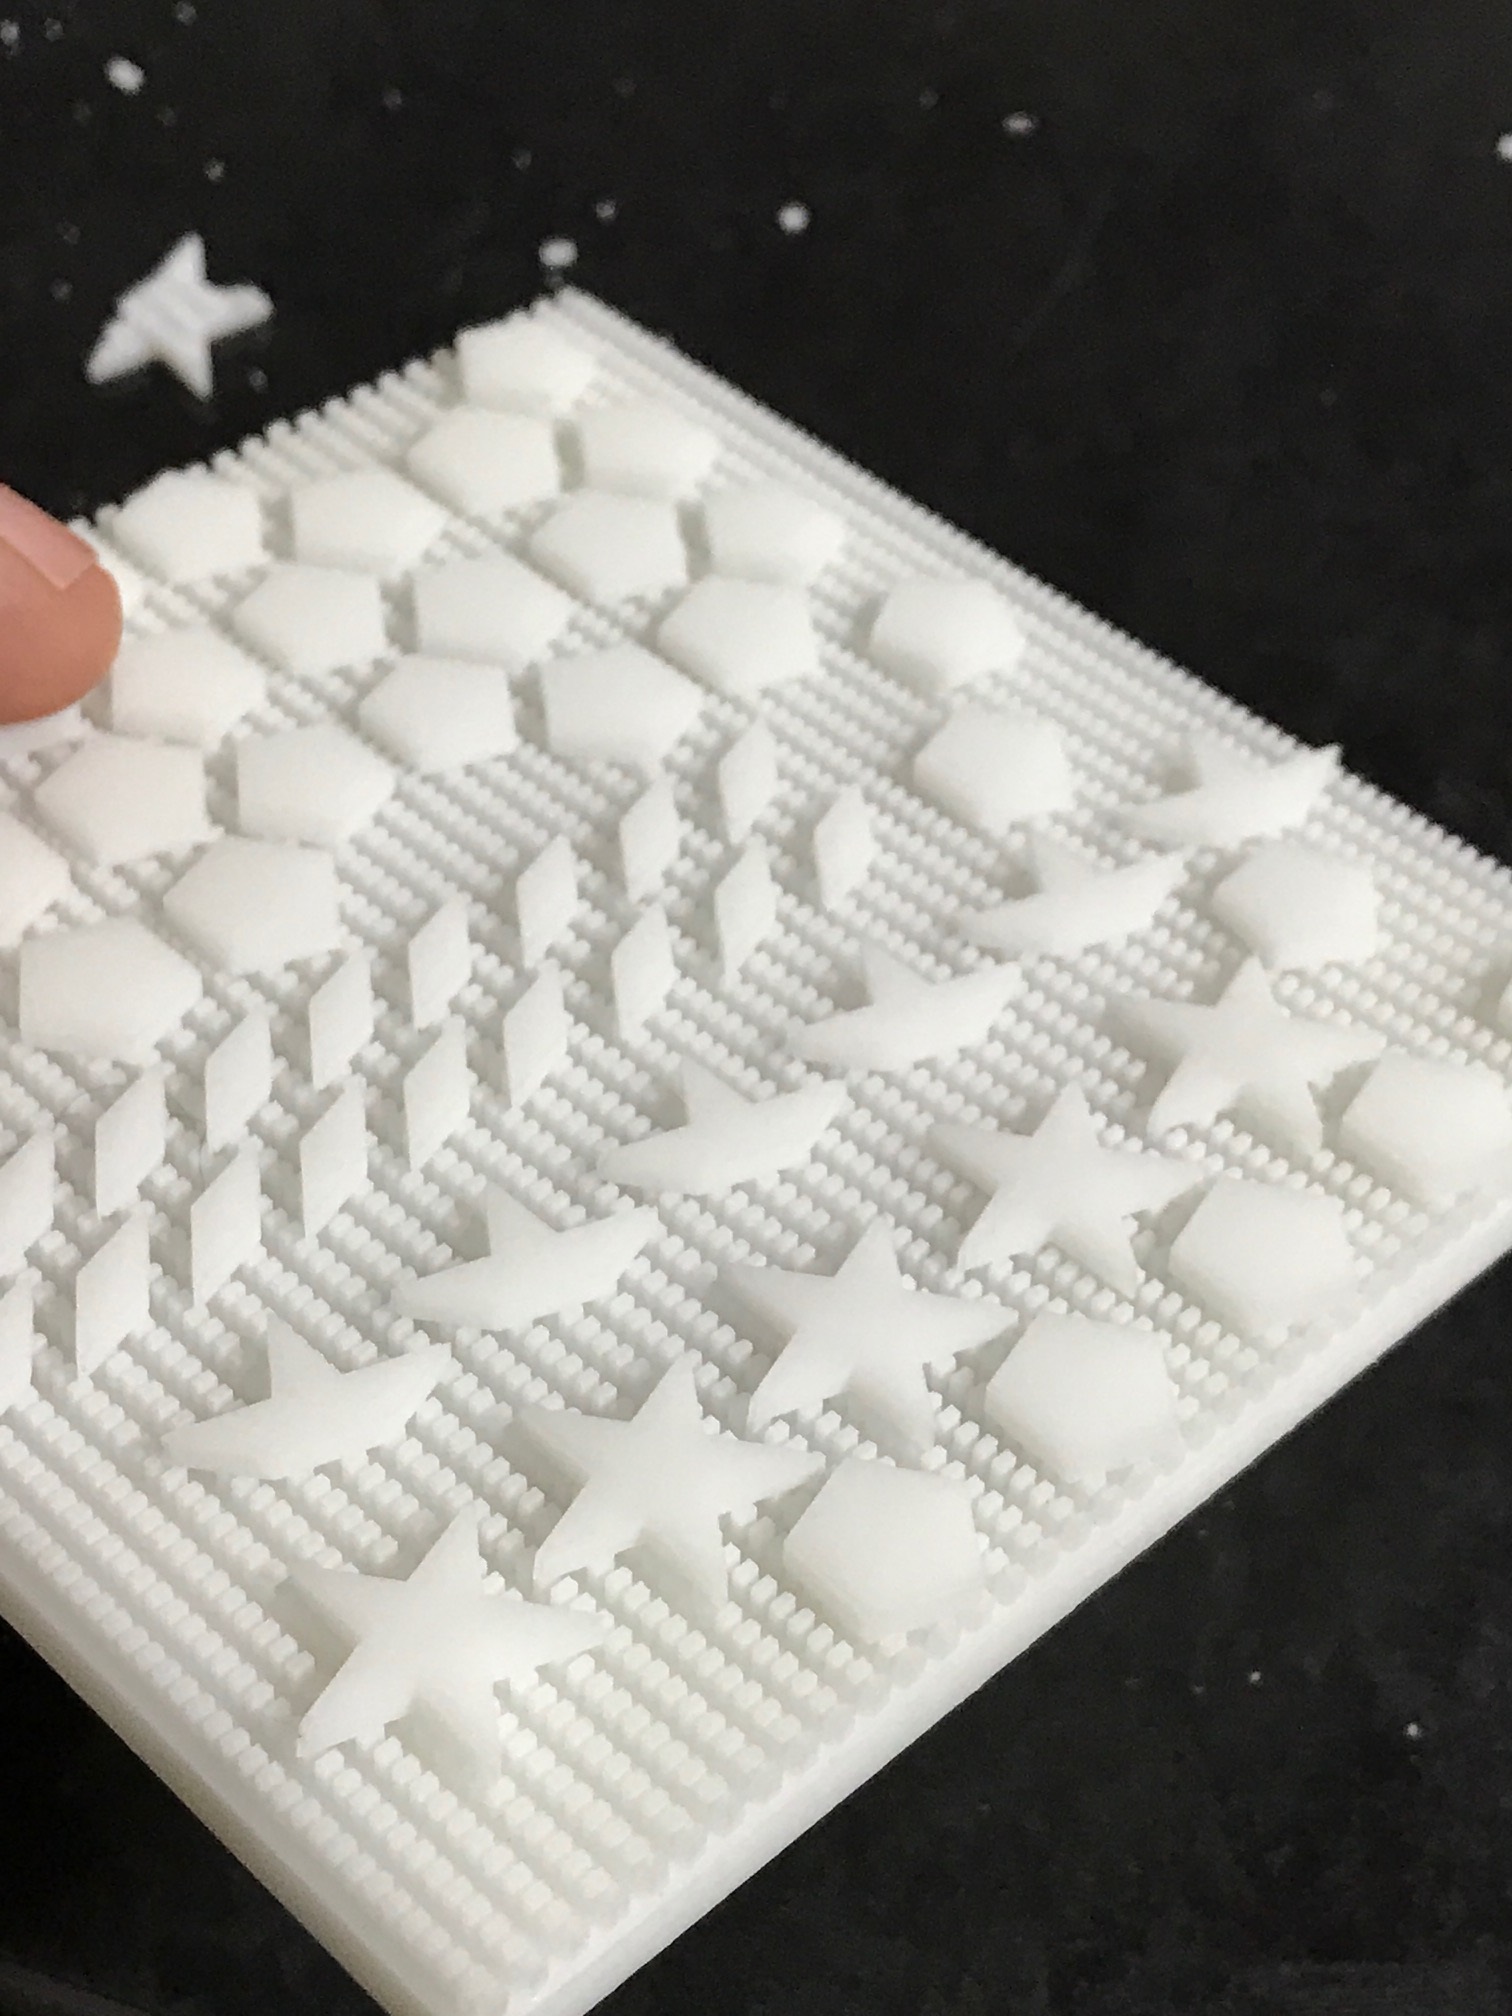
Firstly, I decided to fabricate the whole puzzle as a single part. The top of the part contains the frame into which the tiles sit. The tiles themselves are attached to the back of the frame and need to be sliced off. They are supported by a series of pillers 2x1mm in size and 2mm tall. I figured they would be easy to hack off. I was wrong, this was horribly difficult. I opted to fabricate the puzzle as one part because Itead (also most other SLA printing services) charge a fixed fee per part. As there are so many parts, creating each tile separately would be very expensive (probably 100 to 200USD in total).
I should most likely use either fewer, or different pillars to support the parts, or try a different strategy. Perhaps laser cutting this model would also be a better option.
There were a couple of thing that worked out well with the pillars though. I was surprised that they all fabricated correctly. No pillars were joined together under the parts. They didn’t cause any issues during printing, and it’s interesting to note that you can create complex void like this…
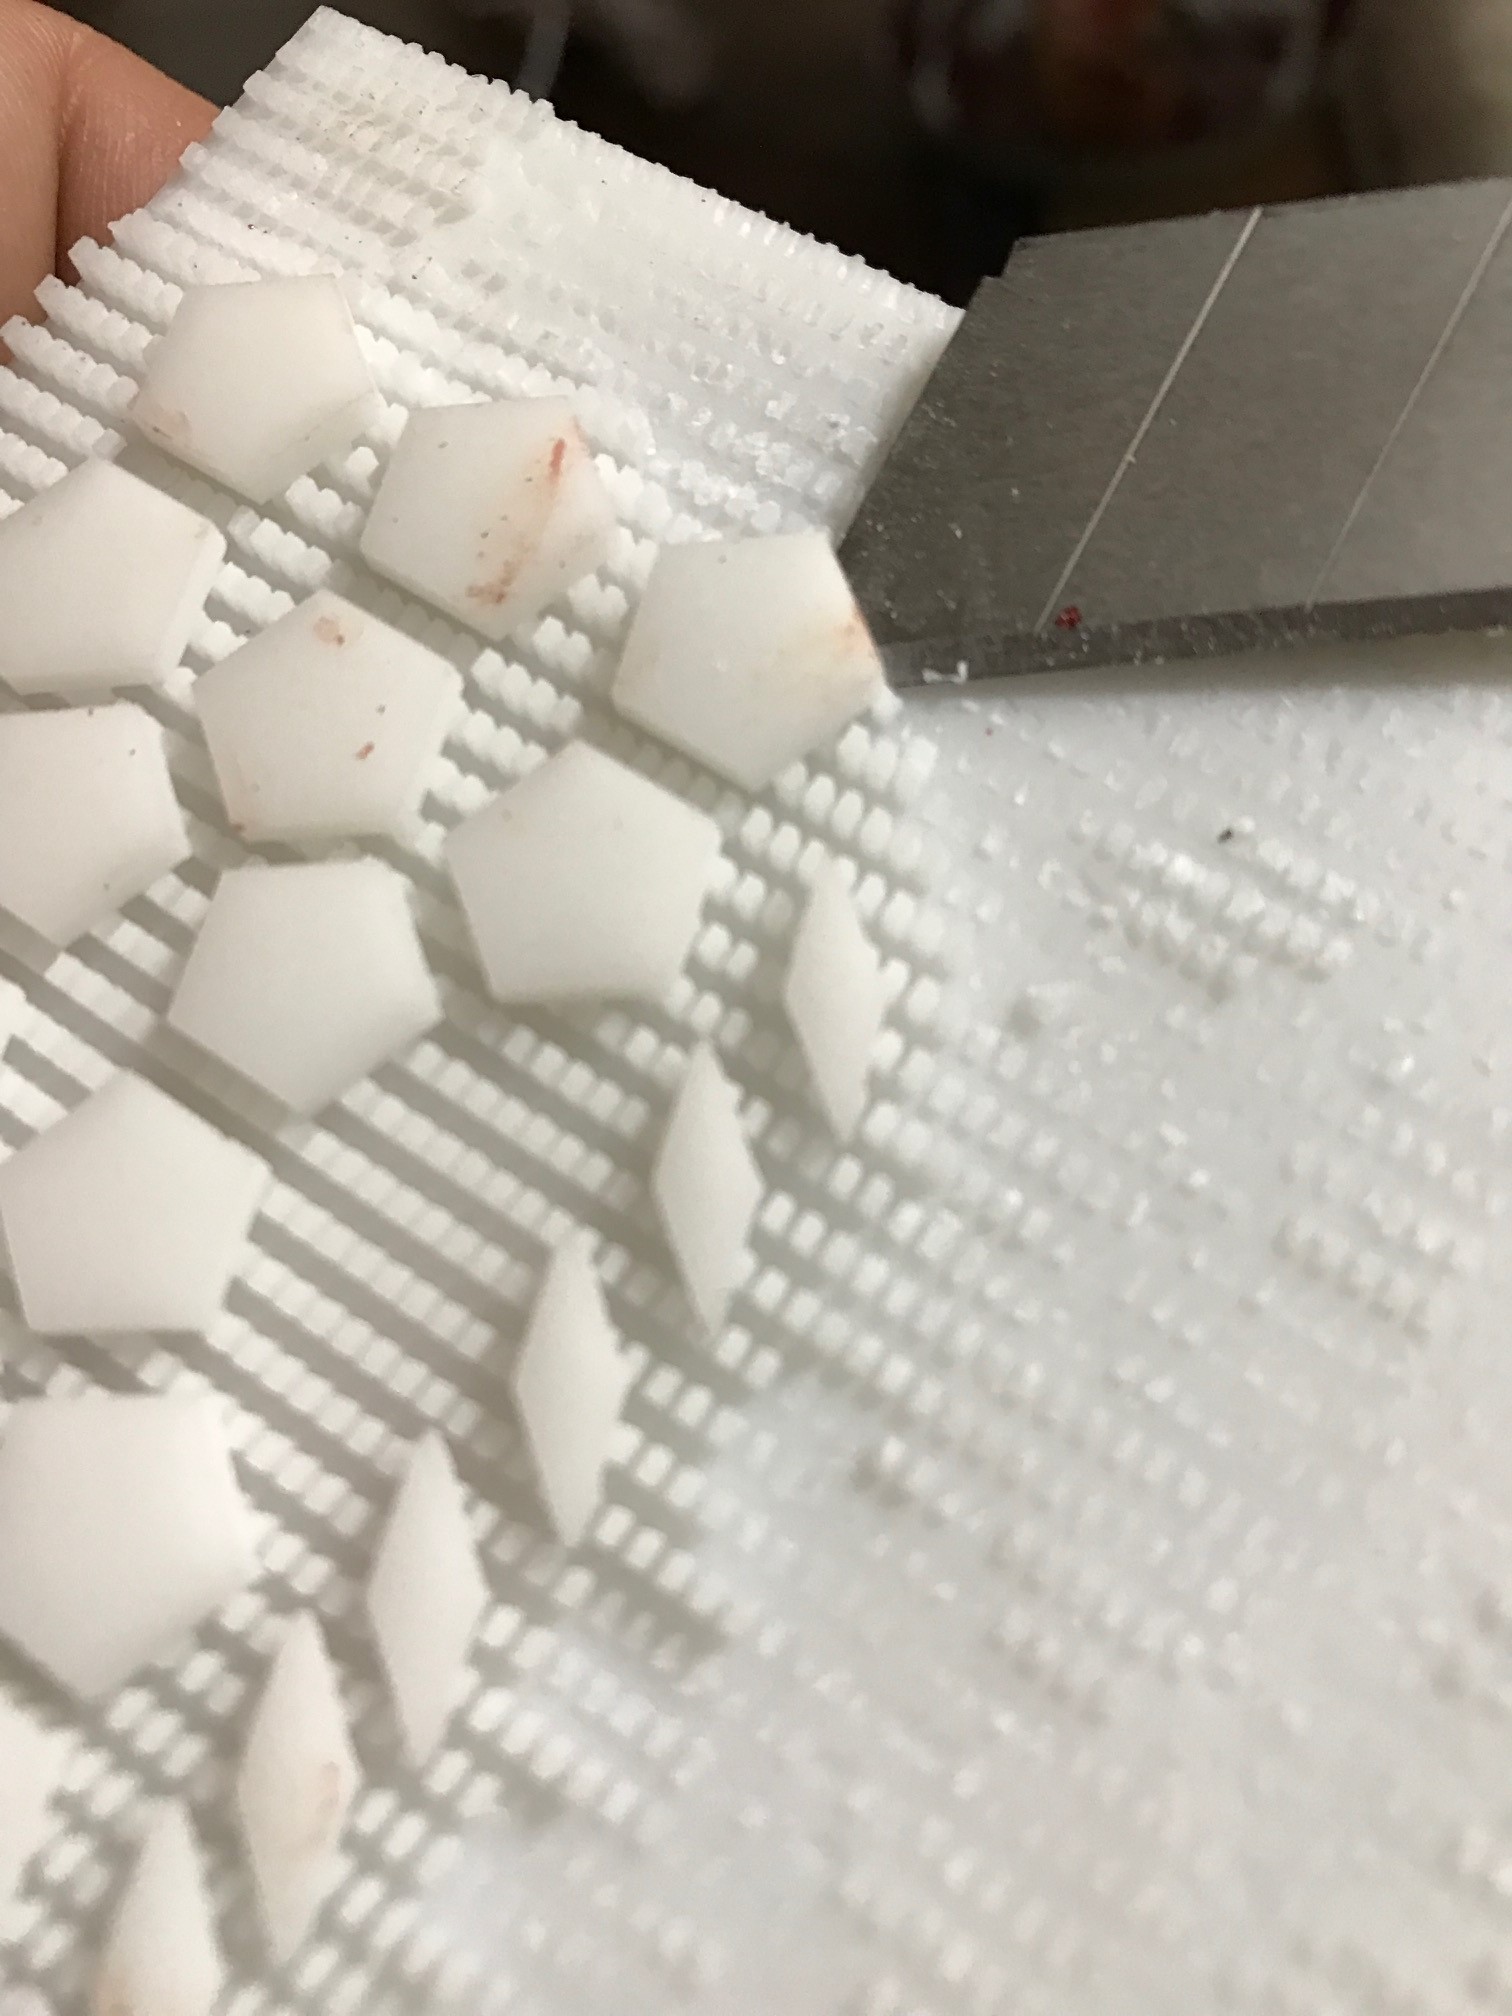 Hacking all the parts off took an age. The “stars” were also difficult to remove without breaking, but with some practice they could be removed relatively easily.
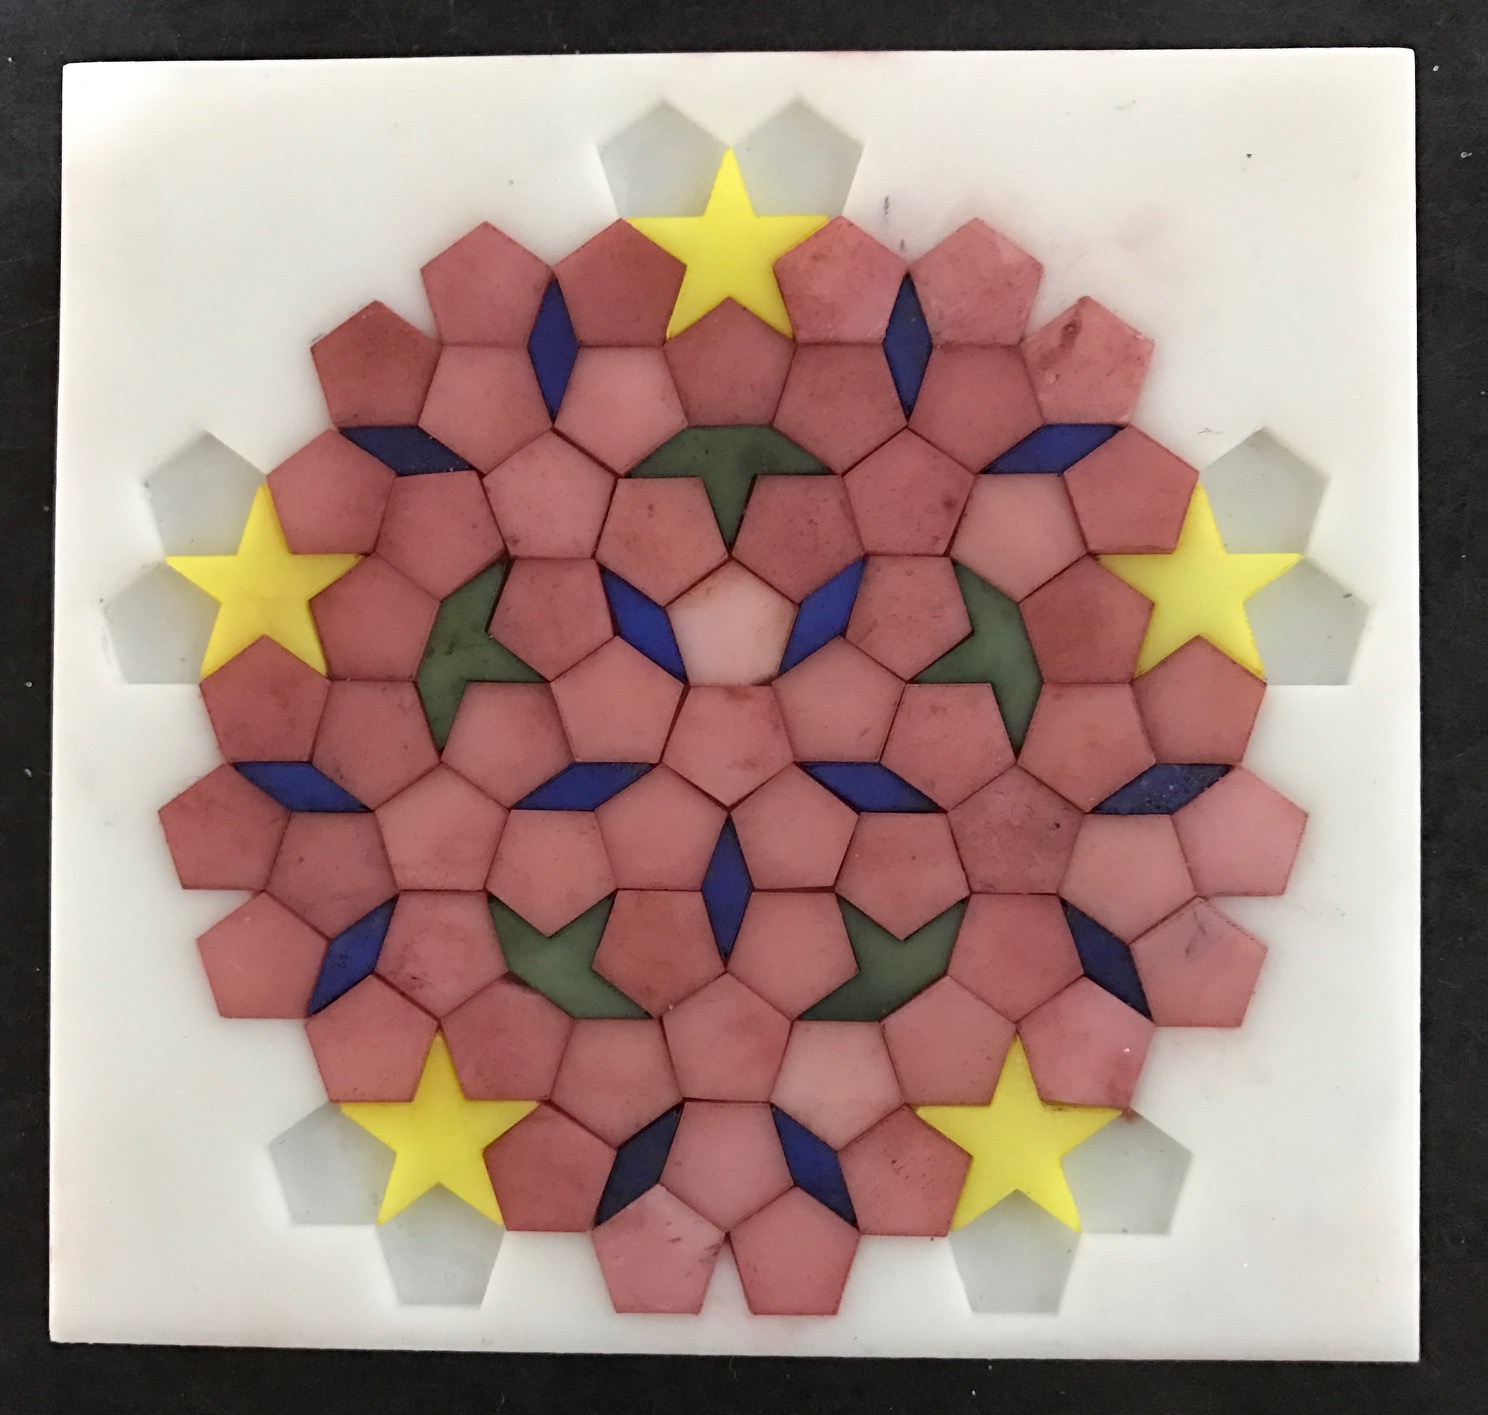
After removing the parts I did a fit test. As it turns out about 30% of the pentagons were the wrong size (about 1mm too big). Filing these down took a long, long time. I believe this is a design error on my part, the majority of parts had no issues. I was concerned that they might not fit in the frame as I’d given no tolerance in the design to allow for fabrication differences. The tiles were design to exactly fit in the frame with no extra space.
You can see in the fit test to the right that hunks of the pillars remained on the parts. Each part therefore needed to be filed down separately to get it flat. This also took much longer than I’d like and leaving me looking for better solutions.
Overall though, this was a reasonably successful experiment. I’ll be thinking about how to move forward, and if 3D printing is really the best option or if other methods might be better.