Archive for the ‘Uncategorized’ Category.

LTC1859CG Evaluation board with an Arduino

arduino_ltc1859

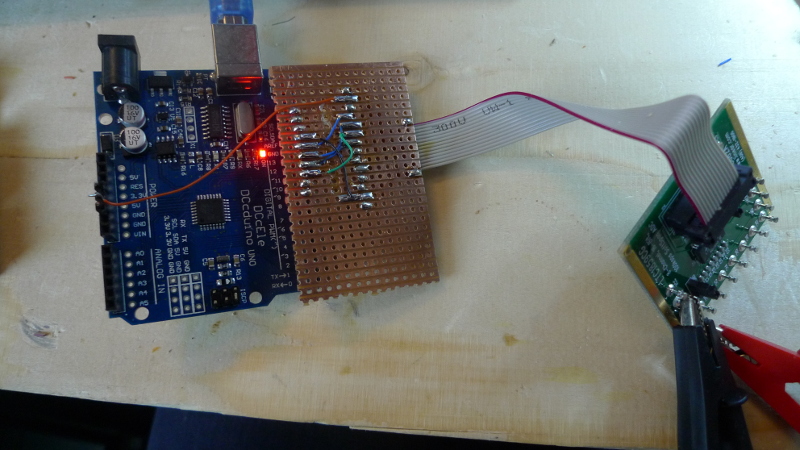
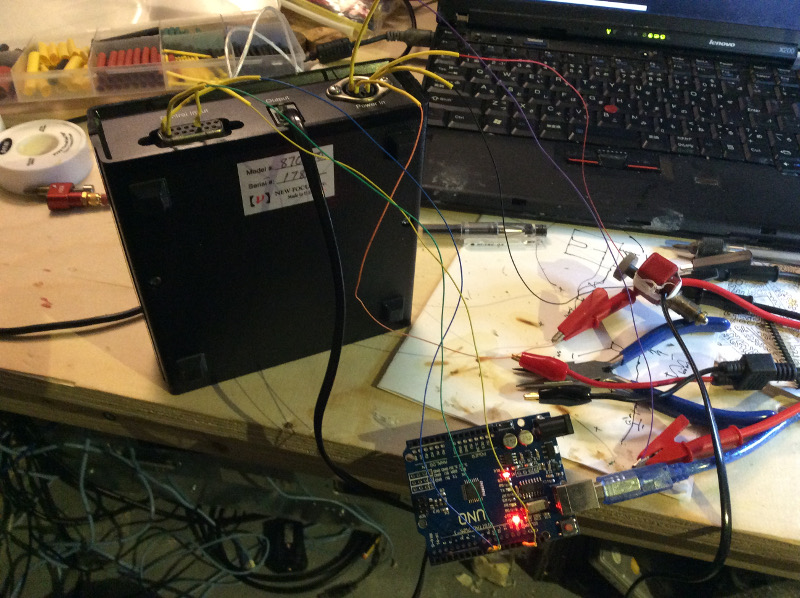
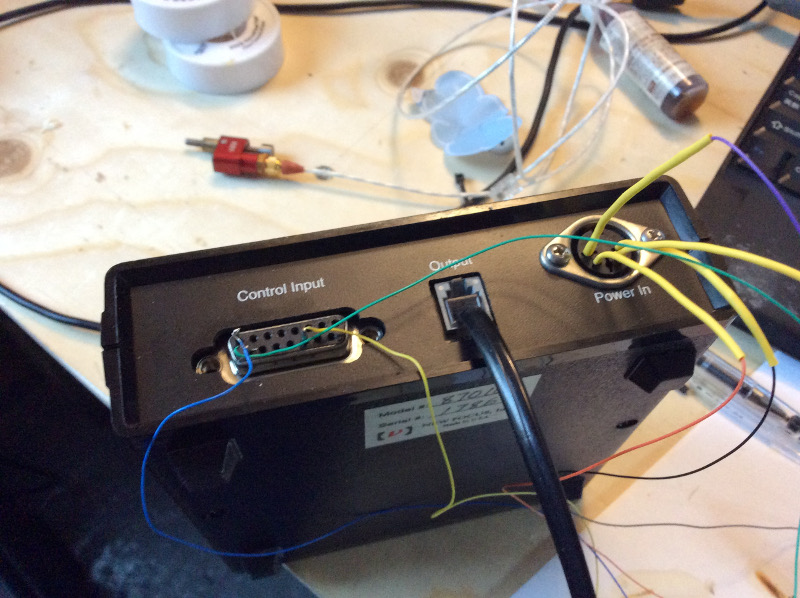
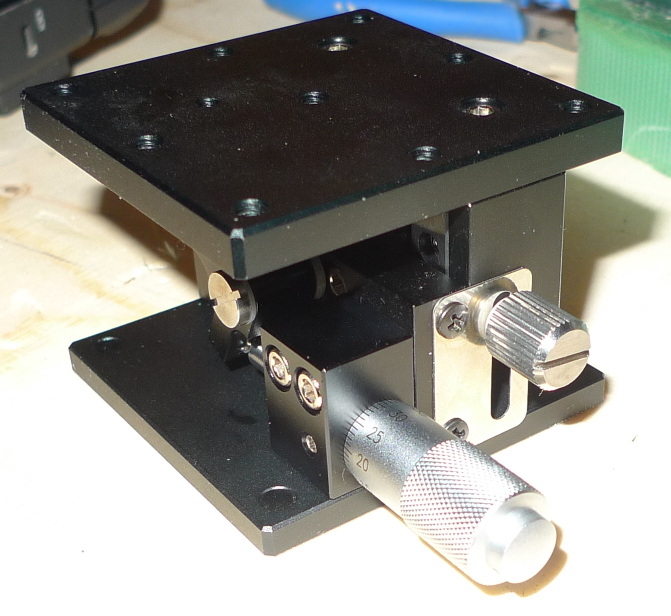
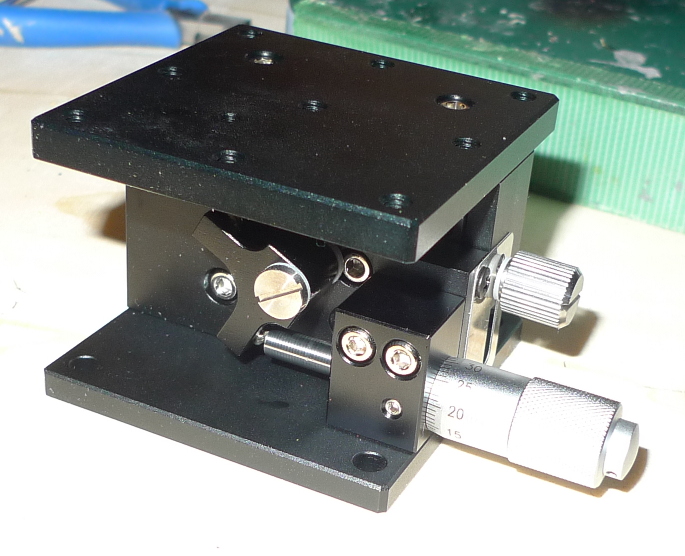
I’ve been playing with a LTC1859 Evaluation board. Linear supply code for their Linduino platform (which costs a lot) and a cable to connect to it. However the Linduino is really just a standard Arduino with a special connector. I wired up the SPI interface to the board as shown above and it works fine (a couple of the ground connections are not connected above, I needed to connect them all before the board was stable). The code adapted from the Linduino library and their LTC1859 example is in the tarball below:

DC682A.tar

DC682A.ino can be simplified to the following to give a continuous single channel voltage reading:

1
2
3
4
5
6
7
8
9
10
11
12
13
14
15
16
17
18
19
20
21
22
23
24
25
26
27
28
29
30
31
32
33
34
35
36
37
38
39
40
41
42
43
44
45
46
47
48
#include <Arduino.h>
#include "Linduino.h"
#include "LT_SPI.h"
#include "LT_I2C.h"
#include "LTC1859.h"
#include <SPI.h>
#include <Wire.h>                        
 
void setup()
{
  uint16_t adc_code;
   
  quikeval_SPI_init();           // Configure the spi port for 4MHz SCK
  quikeval_SPI_connect();        // Connect SPI to main data port
  Serial.begin(115200);          // Initialize the serial port to the PC
}
 
//! Repeats Linduino loop
void loop()
{
  uint16_t user_command;
  uint16_t adc_command;         // The LTC1859 command byte   
  uint16_t adc_code = 0;    // The LTC1859 code
  float adc_voltage;
  uint8_t x, y, startcount, endcount;
 
  uint8_t uni_bipolar = LTC1859_BIPOLAR_MODE;
  uint8_t single_ended_differential = LTC1859_SINGLE_ENDED_MODE;
  uint8_t range_low_high = LTC1859_HIGH_RANGE_MODE;
 
  startcount=0;
  endcount=0;
   
  float LTC1859_vref = 10;
 
  adc_command = LTC1859_CH0 | uni_bipolar | range_low_high;
  LTC1859_read(LTC1859_CS, adc_command, &adc_code);     // Throws out last reading and starts CH0 conversion
  adc_command = LTC1859_CH0 | uni_bipolar | range_low_high; // Send channel config for the NEXT conversion to take place
  LTC1859_read(LTC1859_CS, adc_command, &adc_code);   // Read previous channel conversion (x-1) and start next one (x)
  LTC1859_read(LTC1859_CS, adc_command, &adc_code);   // Read previous channel conversion (x-1) and start next one (x)
            
  adc_voltage = LTC1859_code_to_voltage(adc_code, LTC1859_vref, range_low_high, uni_bipolar);
  
  //Serial.println(adc_code, BIN);
  Serial.print(adc_voltage, 4);
  Serial.println();
   
}

Picomotor 8351 Internal Pics

pico8351_notes

I decided to have a poke around in one of the Picomotors I bought. The construction is fairly simple. I’ve annotated the above picture and it matches the description in the product documentation well:

slipstick

A nice neat little construction! More pics below:

pico8351_6

pico8351_1

pico8351_2

pico8351_3

pico8351_4

Playing with Picomotors

arduino

I’ve written about slip-stick motors before here and I’ve now purchased a couple from ebay to play with.

I acquired both 30nm and 100nm resolution Picomotors and a Picomotor 8701 driver. This post documents the process on getting them up and running.

This is the 30nm resolution motor:

picomotor

It’s kind of seen better days. The case is coming off and I wrapped teflon tape round it to hold it together. It does work however!

Slip-stick motors work using the difference in motion caused by static and dynamic friction. It’s rather neat and you can read more about it here. But it means they only require a single piezo stack give clockwise and anti-clockwise rotation. Giving you 30-100nm resolution over ~25mm travel.

slipstick

The 8701 driver didn’t come with a power supply, but luckily it’s quite well documented (local copy). It requires +12,-12 and 5V supplies. It also used an old DIN type connector. Unfortunately I didn’t have one knocking around so had to make do with board pins. Hopefully the one I’ve ordered from China will turn up in the new couple of weeks, same goes for the 15pin input signal connector.

func

For the moment I’m running it off a bunch of lab supplies, but will probably put together something more permanent at some point:
power

Driving the motor is pretty straight forward. There’s a 5v “step” input pin (which triggers on the negative edge), and a direction pin. The motor can be driven at upto 1KHz. Initially I drove it using a function generator:

control

Finally I knocked a quick Arduino Sketch together to drive to motor over serial (code below):

arduino

1
2
3
4
5
6
7
8
9
10
11
12
13
14
15
16
17
18
19
20
21
22
23
24
25
26
27
28
29
30
31
32
33
34
35
36
37
38
void setup()
{
  // start serial port at 9600 bps and wait for port to open:
  Serial.begin(9600);
  while (!Serial) {
    ; // wait for serial port to connect. Needed for Leonardo only
  }
 
  pinMode(8, OUTPUT);
  pinMode(9, OUTPUT);
}
 
int cspeed = 1;
void do_steps(int dir,int dspeed) {
 
  digitalWrite(9,dir);
  for(int n=0;n<dspeed;n++) {
    digitalWrite(8,1);
    delay(1);
    digitalWrite(8,0);
    delay(1);
  }
 
}
 
void loop()
{
  // if we get a valid byte, read analog ins:
  if (Serial.available() > 0) {
    // get incoming byte:
    int in = Serial.read();
     
    if(in == 'W') {do_steps(1,cspeed); Serial.print("S");}
    if(in == 'S') {do_steps(0,cspeed); Serial.print("S");}
    if(in == 'P') {cspeed++; Serial.print(cspeed); Serial.print("\n");}
    if(in == 'L') {cspeed--; Serial.print(cspeed); Serial.print("\n");}
  }
}

Cheap Z-stage (SELN LZ-60 Shengling Precise Machinery CO. Ltd)

zstage3

I picked up this cheap Chinese Z-stage on ebay, it was only 100USD and I wasn’t expecting much but it’s actually pretty well put together. It uses a standard micrometer head and I could fit both a Picomotor and the Chuo Seiki AMH-13 in its place (which works well).

The micrometer head provided (pictured below) is easily the nicest micrometer I’ve seen come out of China. Very smooth and clean, there does seem to be a small amount of grit left in there but overall very nice (particularly considering the price).

The linear guides also look very nice, and the overall operation of the stage is very smooth.

zstage

zstage2

micrometer

micrometer2