HP t5325 thin client hacked to full Debian system
I’ve been hacking around with a HP t5325 thin client. This post describes how to convert it from a dumb terminal in to a full desktop system (for more general information see here.
The client is designed primarily to connect to Windows Terminal Servers, though it can also run ssh and XSessions natively. But basically it’s a dumb terminal… Unless it’s connected to a more powerful terminal server it can’t do anything useful.
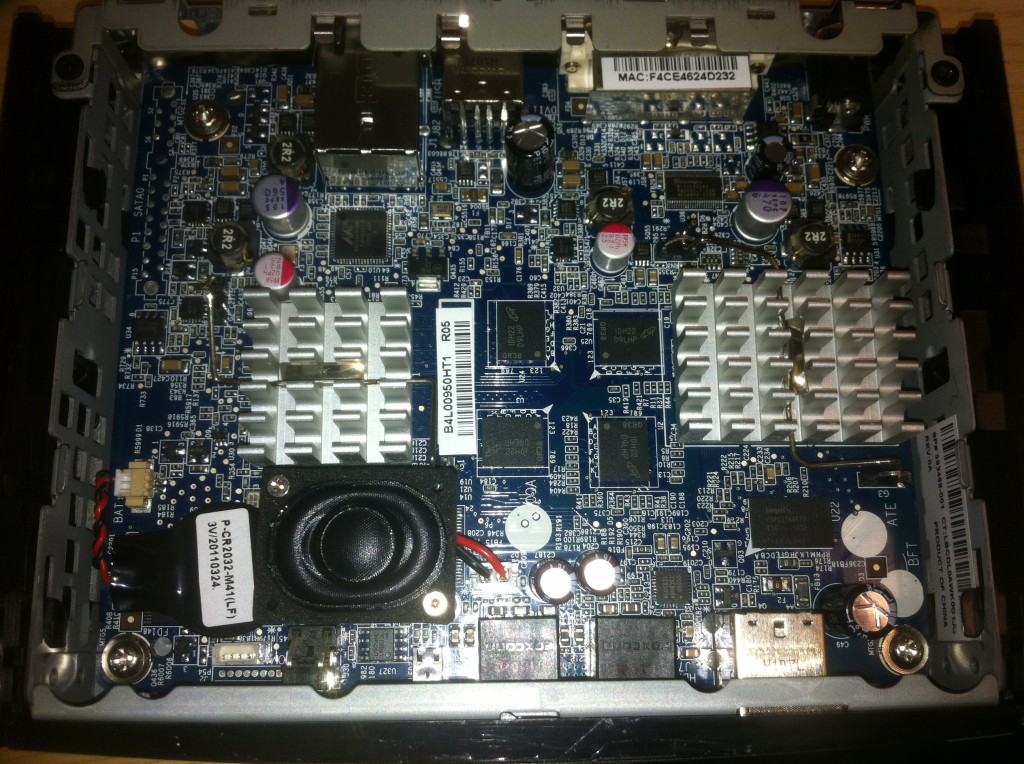
I previously posted about the device internals here. As you can see it only has passively cooled components, which means it’s totally silent:
The processor is a Maxell 1.2GHz ARM Processor, it also has a XGI Volari GPU. For a ARM device this is a pretty powerful system, and it only consumes 8 Watts!
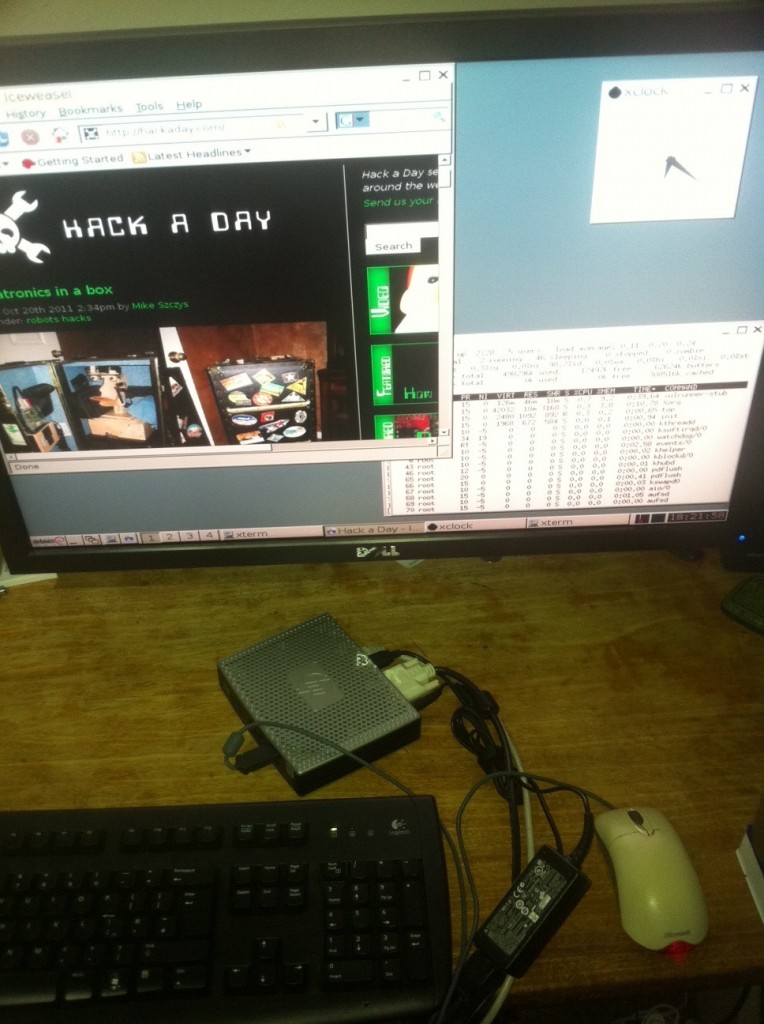
Anyway, when it boots it clearly shows a Linux boot process, so I thought it might be fun to see if it could be hacked into a full desktop Linux system. Turns out it’s not hard at all! In fact, it’s basically running a /slightly/ modified version of ARM Debian! (Lenny).
Here’s the process I went through to get things up and running:
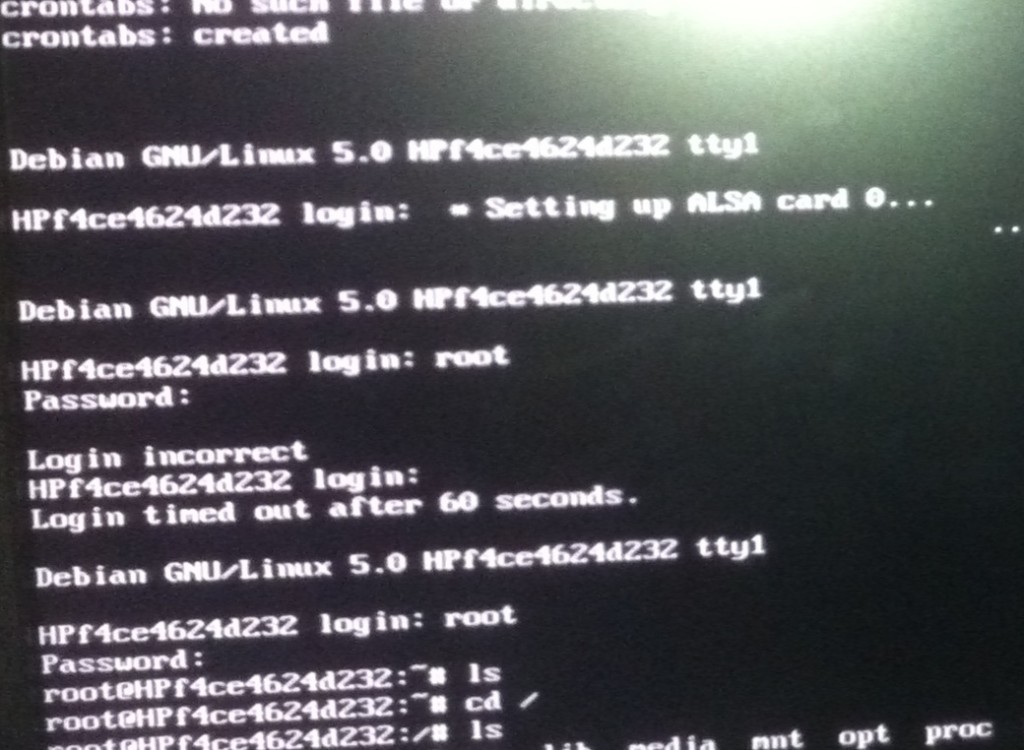
1. While booting hit Ctrl-C /a lot/ this crashes the boot process, and stops X11 from loading. You should see a login prompt:
Neat. HP in their abundant wisdom decided that the root password should be “root”. It was at least easy to guess! Login as root.
3. Remove S95hptc-thinslate-dm:
rm /etc/rc7.d/S95hptc-thinslate-dm
5. Remove all the annoying hptc stuff:
cd /
find . -name K*hptc* | xargs rm
6. Start tmpfs…
/etc/init.d/tmpfs-links start
7. Edit /etc/fstab to make the rootfs readwrite (actually this doesn’t work, but it’s as well to set it up here). Change the list reading “aufs / aufs noauto,ro…” to “aufs / aufa noauto,rw…”.
8. Mount the root filesystem as read-write manually:
mount -oremount,rw /
9. Make a bunch of directories to get apt working correctly, and remove the HP utilities:
# Sometimes, tmpfs dies. If it has we need to create the tmpfs dirs too. As long as apt-get doesn't complain you're ok. If it crashes, apt-get will tell you which directories are missing.

mkdir /tmp/tmpfs/var/lib
mkdir /tmp/tmpfs/var/lib/apt
mkdir /tmp/tmpfs/var/lib/apt/lists
mkdir /tmp/tmpfs/var/cache/apt

mkdir /var/cache/apt/archives
mkdir /var/cache/apt/arhcives/partial
mkdir /var/lib/apt/lists
mkdir /var/lib/apt/lists/partial
mkdir /var/log/apt

apt-get remove hptc* # press Y a couple of times to remove all the packages.
This didn’t work the first time… you need to do the following:
touch /sbin/hptc-sudo-edit
chmod 777 /sbin/hptc-sudo-edit
touch /etc/init.d/mdaemon
Edit /var/lib/dpkg/info/hptc-control-center.postrm (using vi, it’s installed by default) find “exit 1” and change it to “exit 0”.
Try again:
apt-get remove hptc*
apt-get -f install
10. Fiddle around with rcS… (it’s broken…)
Touch rcS:
touch /etc/default/rcS
11. At this point you can use startx, to startx but there’s no window manager…
12. Let’s get the debian repositories back up and running!
Edit /etc/apt/sources.list. The lines for the debian repository (remove the #). Add a # to the line which reads “ftp.hp.com”.
13. Add a startup command to remount the filesystem read-write on boot. Because changing it in fstab doesn’t work. Edit /etc/rc.local add the following line:
mount -oremount,rw /
14. Bring up networking. DHCP will currently be broken. So you’ll need to configure the device with a static IP address first. But we’ll put a dhcp based configuration in place.
Create /etc/network/interfaces with the following contents:
auto eth0
iface eth0 inet dhcp
Create some missing files:
mv /etc/network/run /etc/network/run.old
mkdir /etc/network/run
touch /etc/network/run/ifstate
Now bring up the interface statically:
ifconfig eth0 192.168.1.35 # You'll need to use an IP address on your own local network
route add default gw 192.168.1.1 # Again, your local network default gw
Edit /etc/resolv.conf to read as follows:
nameserver 8.8.8.8
ping google to test it:
ping www.google.com
Check that you see ping replies, then hit Ctrl-C.
We should now be able to access the Debian repositories, this means we can reinstall a new dhcp client…
apt-get remove dhcp3-client
apt-get install dhcp-client
rm /etc/init.d/network-manager
touch /etc/init.d/network-manager
15. Get X windows working:
apt-get remove xserver-xorg
apt-get remove xfwm4
mv /etc/X11 /etc/X11.old
apt-get install xserver-xorg
apt-get install icewm
Edit /etc/lsb-base-logging.sh and remove line 270 which reads:
( [ -x $SPC_UPD || return 1; ]
Install gdm
apt-get install gdm
/etc/gdm restart
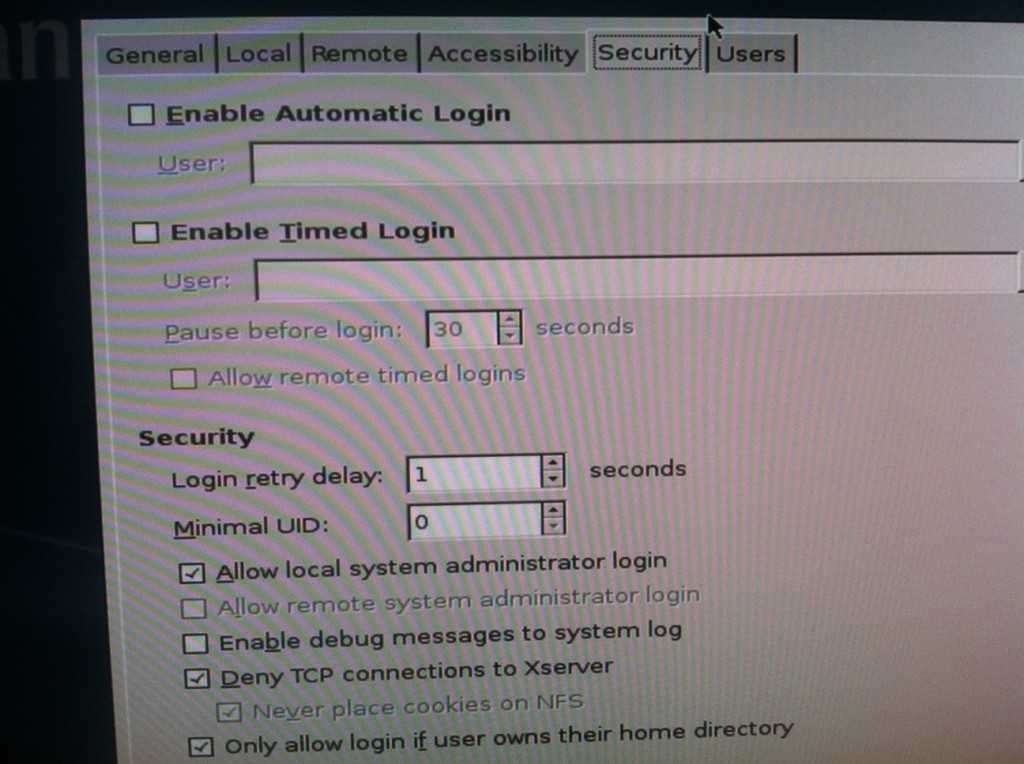
gdm should now start and you should see a login screen! You need to configure gdm to allow root logins (you could of course add another user if you wanted to too):
GDM will fail to start the window manager and give you a failsafe terminal. But you can start icewm from here. Just type “icewm”.
Iceweasel should already be installed and you can fire it up from the Applications menu!
So there you go! A fully running Debian system! There are lots of tweaks you can now do. For example you’ll probably want to set gdm to start at boot, and get the window manager loading correctly. But the system is now up and running!


Great Post… I saw a similar blog where the guy used Arch linux and HP hardware. Awesome stuff!
Do you think all the HP t5325 thin client are configured like this? I guess what I’m trying to say is; If I buy one, do you think I will be able to do the same thing?
I have several of these laying around, nice to know I can do something besides used as a paperweight.
I think so, the one I tried this on was purchased in the last couple of months, so I should think it’s a current firmware. You might also be able to downgrade the firmware on newer models.
Would like to donate one of the thin clients?
[…] http://41j.com/blog/2011/10/hp-t5325-thin-client-hacked-to-full-debian-system/ […]
Hi,
great post, but I think you have a little typo that will probably cause a linux beginner some trouble:
mb /etc/network/run /etc/network/run.old should be “mv” instead of “mb”.
Now I’ll browse the rest of your blog, keep up the good work.
Cheerio
Thanks thobel, fixed.
really awesome work! I’ve been looking for something just like this but I want to use SUSE Linux.
Could you give any tips/hints on how can we flash the stock OS completely and install other OS?
[…] http://41j.com/blog/2011/10/hp-t5325-thin-client-hacked-to-full-debian-system/ Leave a Comment TrackBack URI […]
I´ve got a problem with that hack, my system says on the step apt-get remove hptc*
-bash: apt-get: command not found
🙁
What is the problem ? How can I fix it ?
Greets anf thx
bonjour
je viens d’ acquérir un hp t 5325 ,la connections a internet est configurer en automatique( la connection ne se fait pas, problème du proxy “attente de la réponse avec le serveur est trop lente” ) ,pour la changer , cela ce fait en mode administrateur donc le mot de passe de cette machine n’est pas “root”.
je souhaiterai savoir si il y a possibilité de remédier a ce problème merci pour toutes vos infos cdt.
I am following along with this guide but encountering multiple errors. I imagine you are a busy guy, but maybe if you have a moment you could give me a few tips on what I’m doing wrong. Looking forward to hearing from you.
I would just note that lenny is no longer supported on the main debian site, and your sources.list now needs to be updated to refer to archive.debian.org at step 12
I just got one of the new HP T610’s with the Dual Core APU thin client, 15 watts…. 🙂
Hello,
I’ve also tried this. I’ve ran into a few problems.
First, when i run the find . -name K*hptc* | xargs rm it tells me that is cannot remove about half the files.
Second when i run the apt-get remove hptc* it can’t remove the hptc-control-center and the hptc-easy-control-view.
Third and most important i think is that at the point of installing GDM the disk is full.
Please guide me through this.
Thanks.
Very cool! Got my HP t5325 running using your instructions, with a few tweaks here and there. Especially, the command “mount -oremount,rw /” is missing a space after the -o. And of course, the sources.list must address archive.debian.org. There is not much free space on the device. I temporarily used a USB stick to add space so I could do an apt-get upgrade. After some cleaning I now have 38 MB free. Main problem is that Iceweasel is an old 3.0 version. Anyone know if there are any newer browsers available?
Hey, Lenny moved to the archive, do not you modified /etc/apt/sources.list, thank you
Hello
I tried this as well but had to run this first otherwise every other command failed due to read-only file system:
mount -o remount,rw /
I then used squeeze rather than lenny in the sources list but ran out of space whilst running:
apt-get install xserver-xorg
I then tried to clear up temp folders to get more space and ran:
apt-get -f install
However it still ran out of space and then seemed to corrupt saying it couldn’t find lsconfig or something so not knowing what I could move to usb drive or delete I gave up.
Does anyone know how to get around the space limitation?
If you want to set the system back how it was you can download the recovery image from HP and put it onto a FAT32 pen drive and then power off by holding power for 4 seconds then press power lots of times to power it on and it should start to boot from USB (it says 2 times but this wasn’t enough for mine).
Thanks
Robin
Hey mate,
Do you think the latest thinpro can be hacked the opposite way around? I’m trying to help a charity with some old computers, I managed to run on some of them thinpro 4 and was wondering about thinpro 5. Did you have any chance to play with it? It is good because of the central management for example. Thanks!
Hello
i have being trying to use “root” as password on my hp thin client t5325 but is not working. Please i need help
i eventualy got to booting to console and were able to start icewm, but after tampering with /etc/inid.d/rc file i have a screen with INIT:version 2.86 booting.
How can i recover from this?